How to Create a Website #13: Blog and SEO
03/12/2021
How to create a website #15: Speed optimization
17/12/2021
How to Create a Website #13: Blog and SEO
03/12/2021
How to create a website #15: Speed optimization
17/12/2021How to create a website #14: Website Security
We rely heavily on technology. We store important data in the cloud such as personal preferences or stock history. Even financial transactions take place on the internet. Securing them is essential.
I recommend the article Website Security: The road from vulnerability to solution if you haven’t read either book: Successful Web Design or The Online Business Guide. The great advantage of the WordPress platform is the development team that fixes any security vulnerability in a timely manner. Thus, the steps that remain in your account are not difficult to implement.
Firewall System
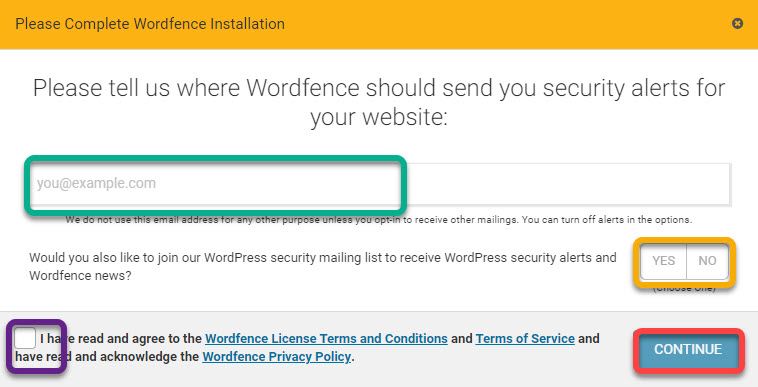
We need a firewall and antimalware system to actively protect the website from attacks and injections. We will use the WordFence plugin, absolutely enough in its free form. After activating, a WordFence button appears in the WordPress side menu. When you enter the page, you will be greeted with a popup asking for your email address. Enter your email in the required field. Below, you have to choose if you want to subscribe to the WordFence newsletter. Choose either of the Yes / No. options. Check that you agree to the terms and conditions and click Continue.
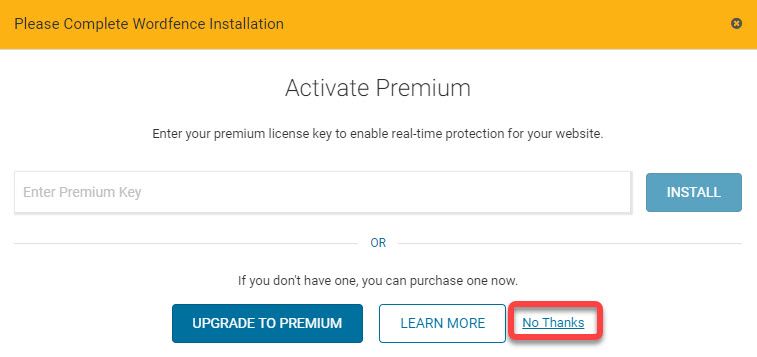
In the next window, click No Thanks to continue with the free version.
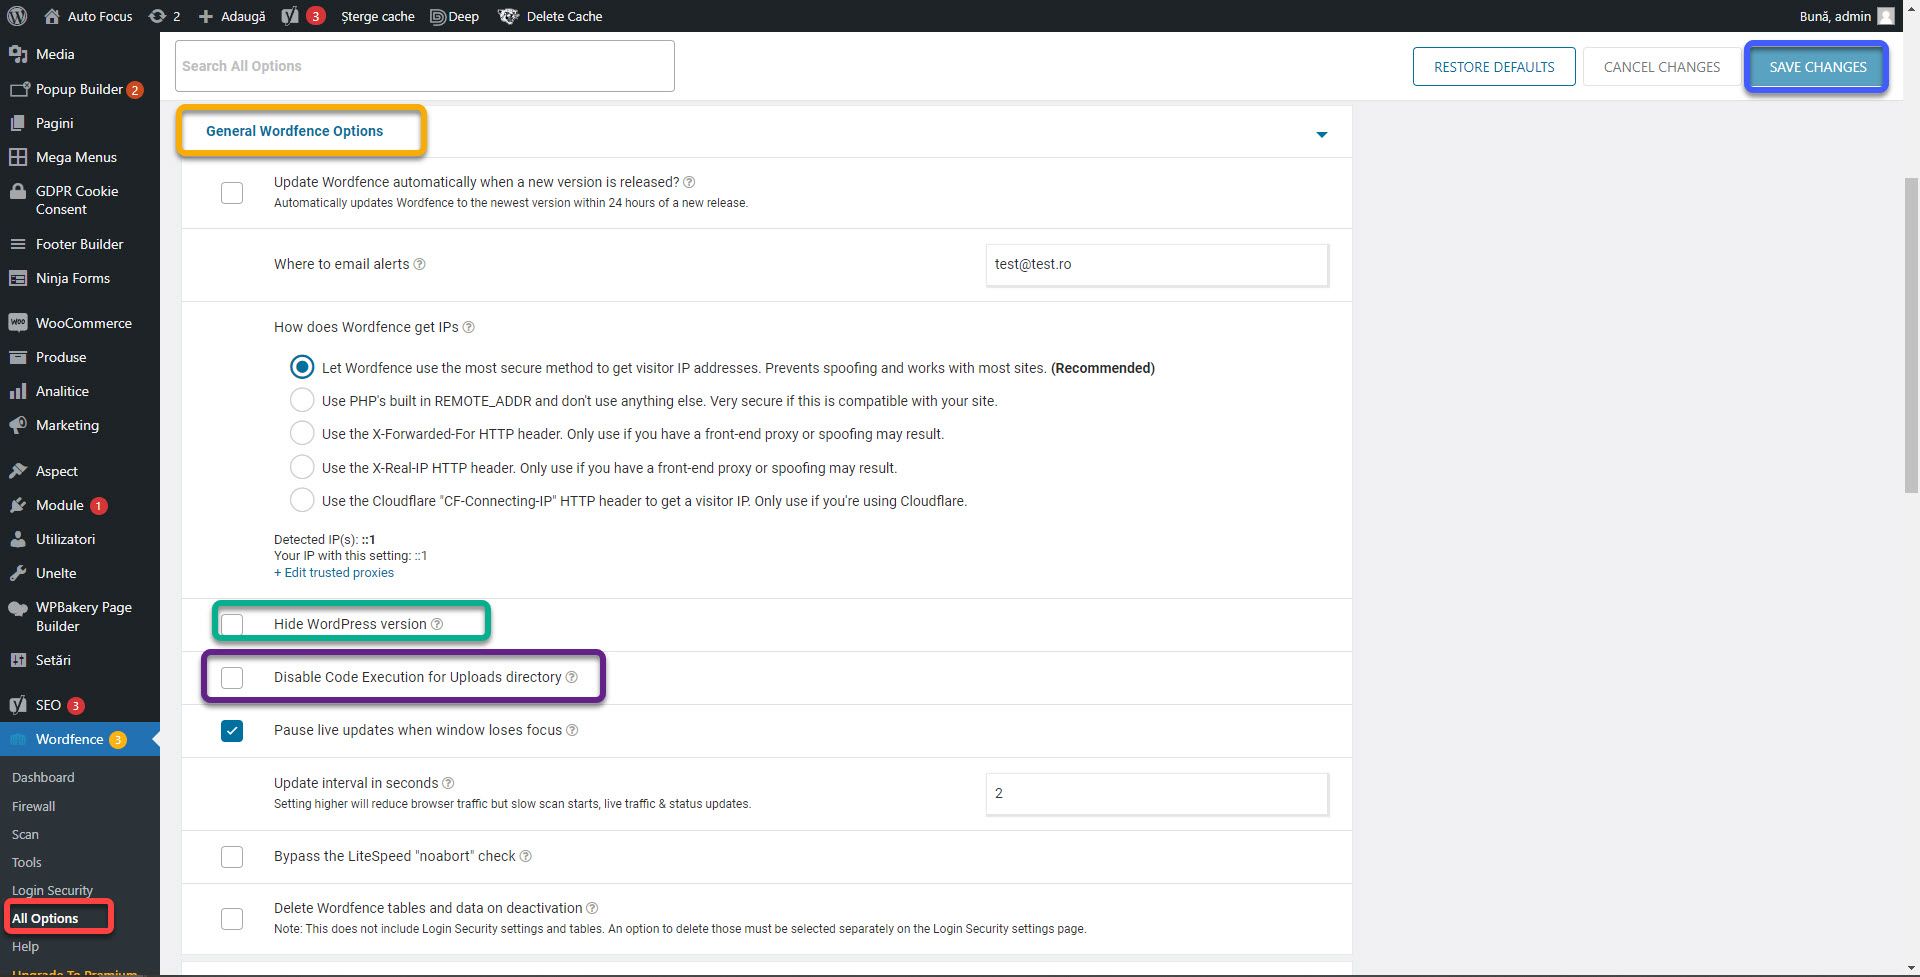
From now on, WordFence protects you from a series of attacks. We will make a number of customizations to increase the security. Go to WordFence, All Options. Here are several sets of options grouped into sections. From the General Wordfence Options section, check the Hide WordPress version and Disable Code Execution for Uploads directory. These two options will eliminate two significant WordPress vulnerabilities. Click the Save Changes button on the top right.
From the Basic Firewall Options section, click the Optimize the Wordfence Firewall button.
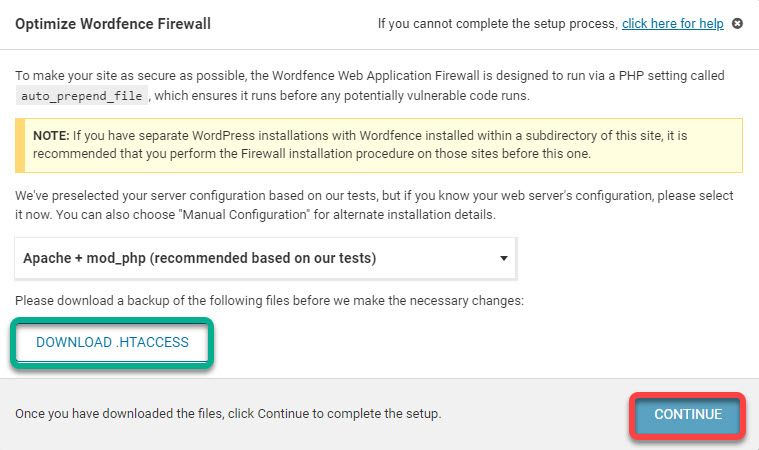
Click the Download .htacces button and then click Continue. In the new window, click Close. Thus the firewall part of the plugin has auto calibrated for your server.
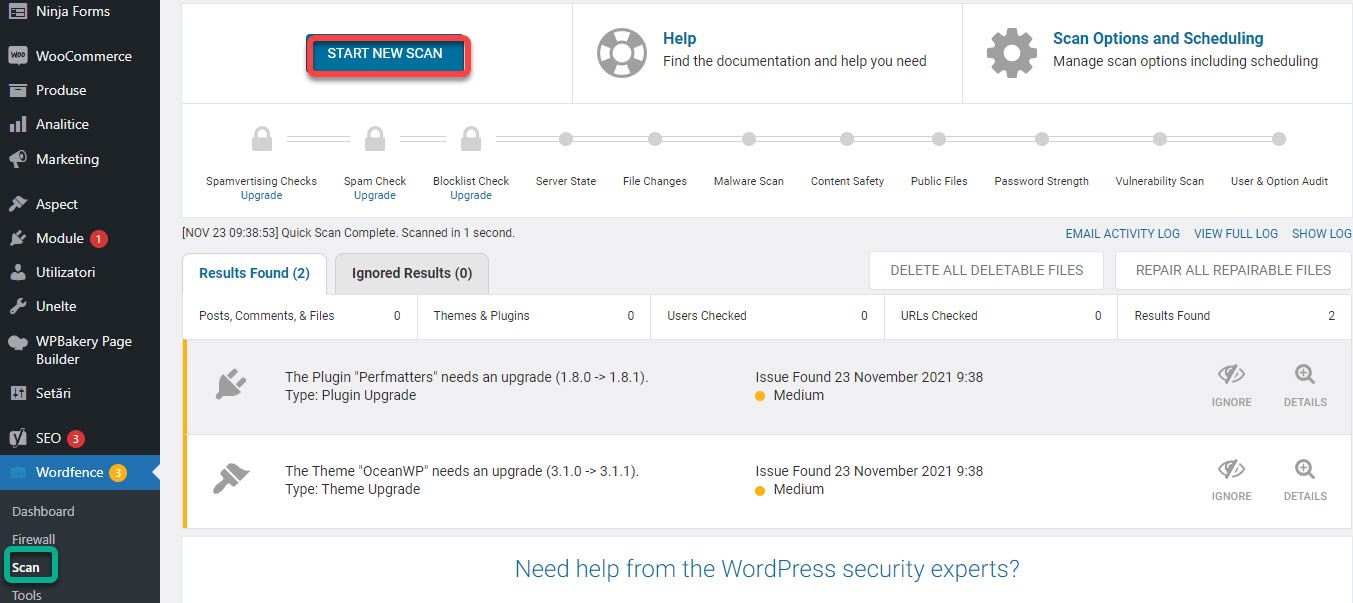
WordFence regularly scans your website for security or virus issues. You can perform a manual scan at any time by going to Scan and pressing Start New Scan. If security issues are detected, they will be displayed in the list where you can take the necessary actions.
SSL Certificate
SSL encryption does not allow anyone to intercept data sent by visitors to your website. It can be very important such as bank cards, passwords, etc. The SSL certificate is purchased through the hosting company. In most cases it is offered free of charge. After installation, you need to redirect all content from HTTP to HTTPS and all external integrations that you use to use HTTPS.
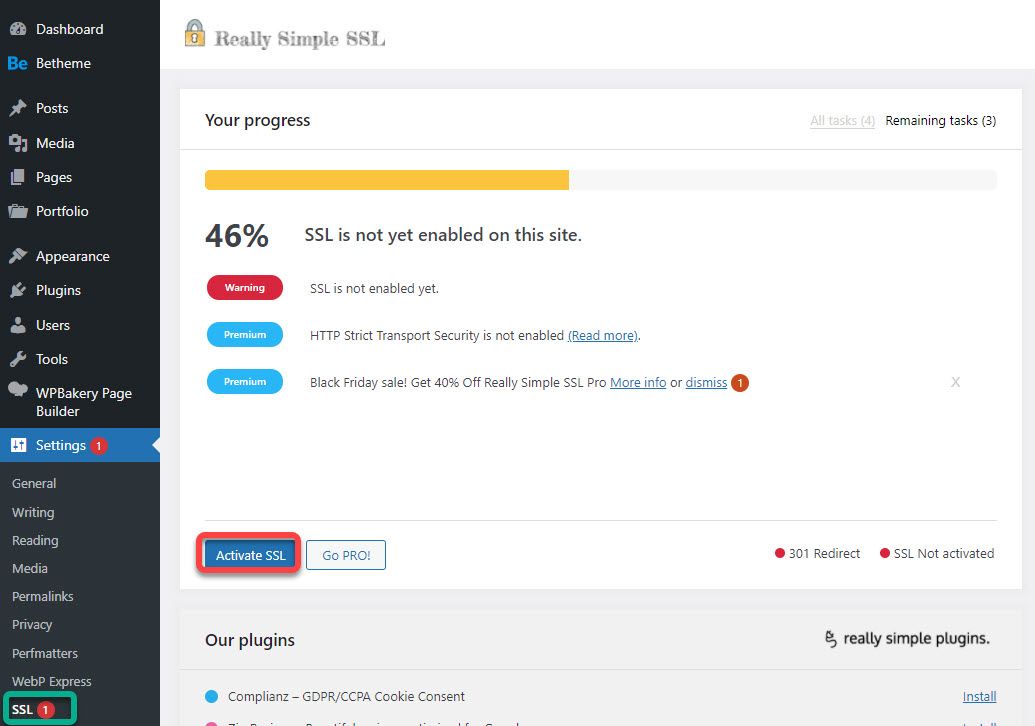
The Really Simple SSL plugin automates the entire process. It can also generate a free certificate for you. Attention! You cannot have an SSL certificate in XAMPP, you need a web domain and an online hosting. After activation, go to Settings, SSL and tap Activate SSL. You may need to reconnect to the website. Now all content will be automatically redirected to the secure version.
Backups
The last point I want you to keep in mind is backups. They are a security measure that does not have the role of prevention, but of remedy. If your website has been attacked, it is very important to have a backup to restore. Especially in the case of an online store, where you have orders and data that you do not want to lose. Cyber attacks are not the only reason to keep children safe. A server-level error may occur or accidentally delete something you need.
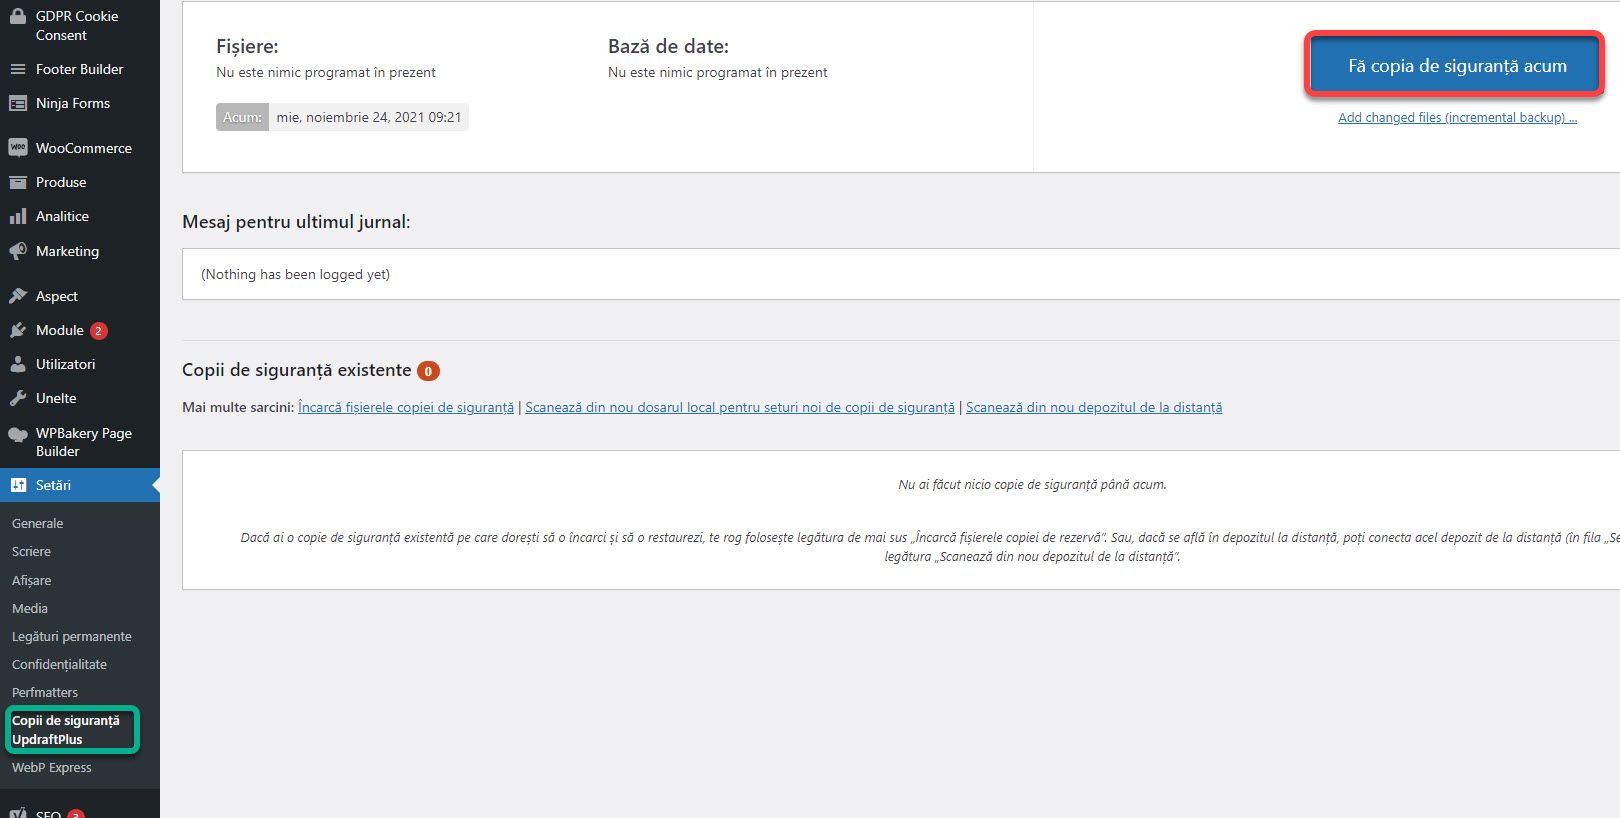
There are many ways to make a copy. Either download the database and all files manually, either using the options in cPanel (in the case of online hosting) or use a plugin. In our example we will use UpdraftPlus. After activation, go to Settings, UpdraftPlus Backup. From here, click on Backup Now.
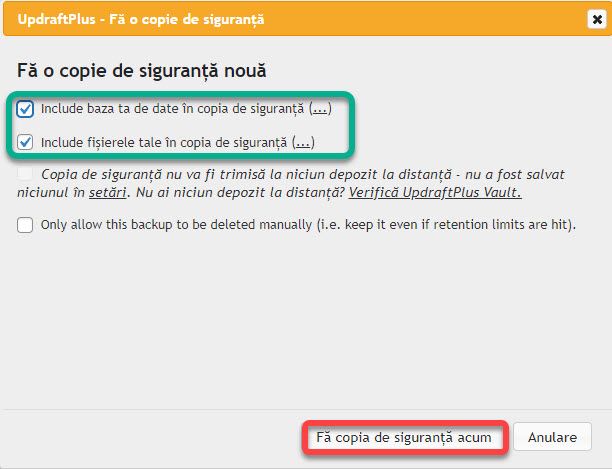
From the window that opens, make sure the two options are checked and click Back up now. The Include database option, backs up the database, and Includes files, makes a copy of the entire website directory.
After completion, the new copy will appear in the list. You can restore it by clicking Restore and delete it by clicking Delete. In the second column, you can download the files to your device by pressing one of the buttons (database, modules, uploads, etc.).
We are approaching the end of the series of articles. If you are confused or need help, I am waiting for you on the SenDesign Community Facebook group!


