How to create a website #10: Contact forms
12/11/2021
How to create a website #12: Setting up an online shop
26/11/2021
How to create a website #10: Contact forms
12/11/2021
How to create a website #12: Setting up an online shop
26/11/2021How to create a website #11: Popup windows
Popup windows are useful when you want to send information to the visitor regardless of his location on the website. It can be offers, discounts, news, newsletter subscription forms or cookies usage warnings.
Image Popups
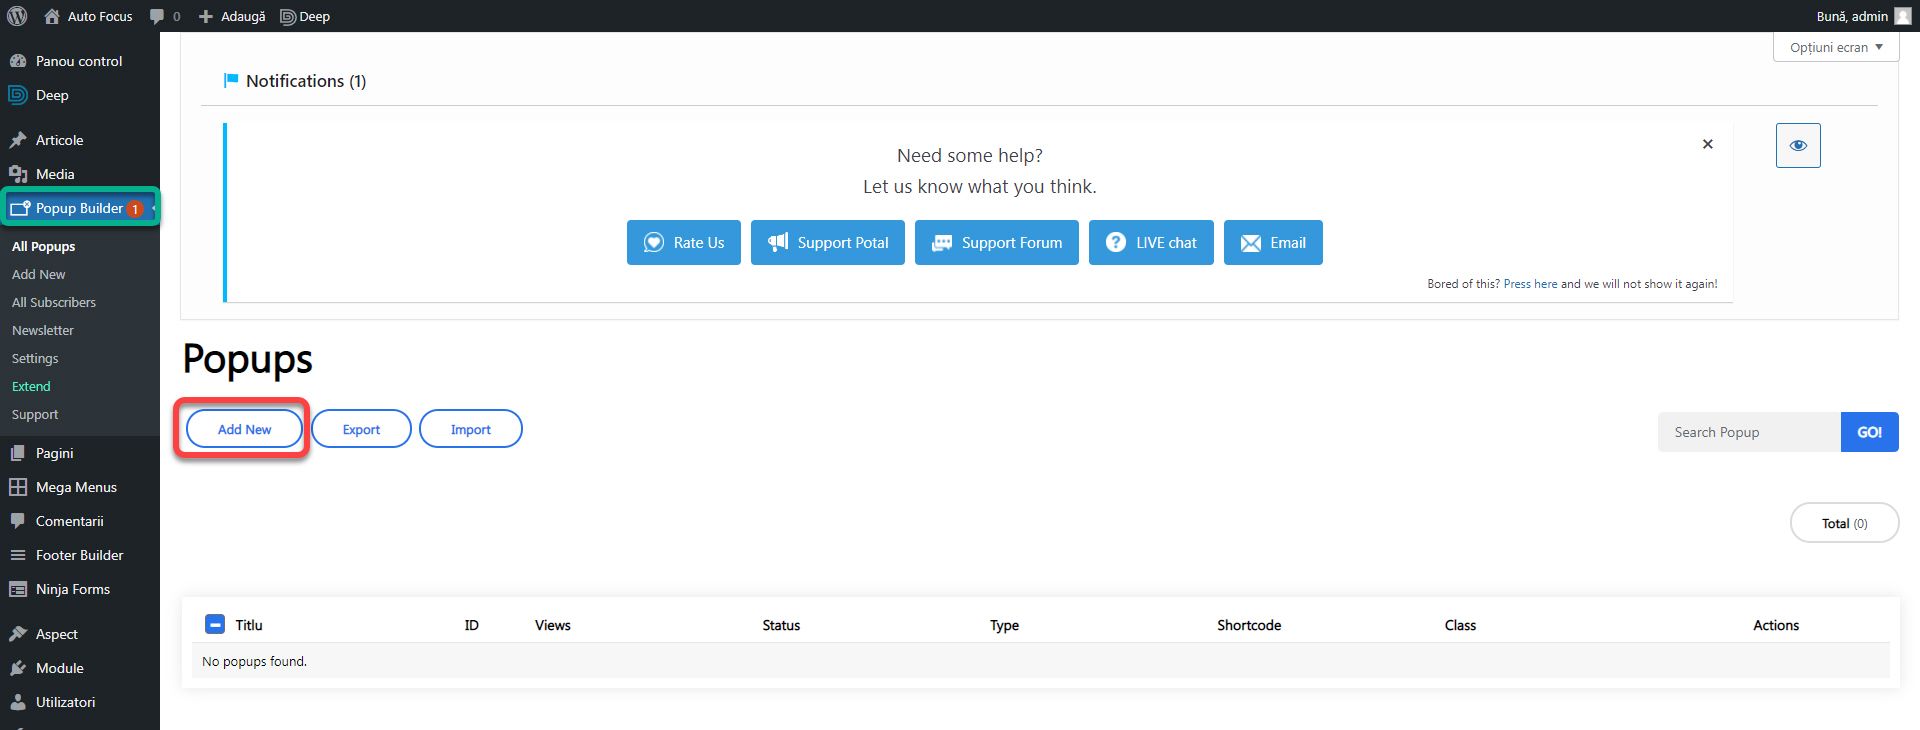
The module we need is called Popup Builder and it is free. Install it and activate it. From the side menu, click on the new button: Popup Builder. Here you will have a list of all created popups. Click Add New.
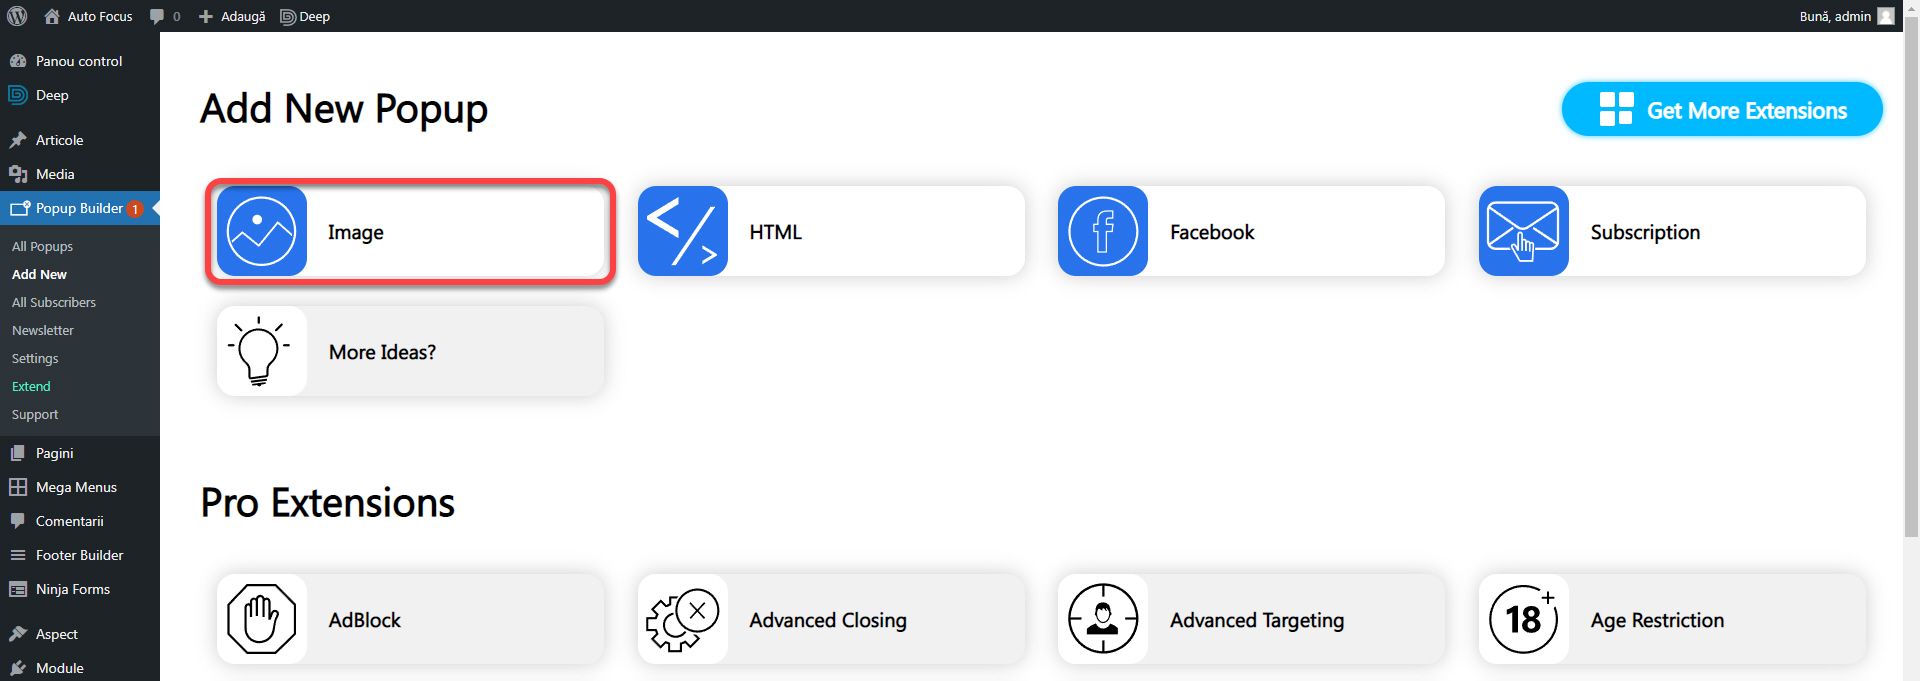
A list of templates to choose from will be displayed. Image, allows you to add an image popup. HTML allows the addition of HTML code or editing via WPBakery (we will set it up later). Facebook will display a window with the page in order to get new followers. Subscription will create a simple newsletter subscription form (the Ninja Forms module addressed in the previous article is much more advanced). There are many paid extensions that add new templates, but some of them can be reproduced for free. Click on Image.
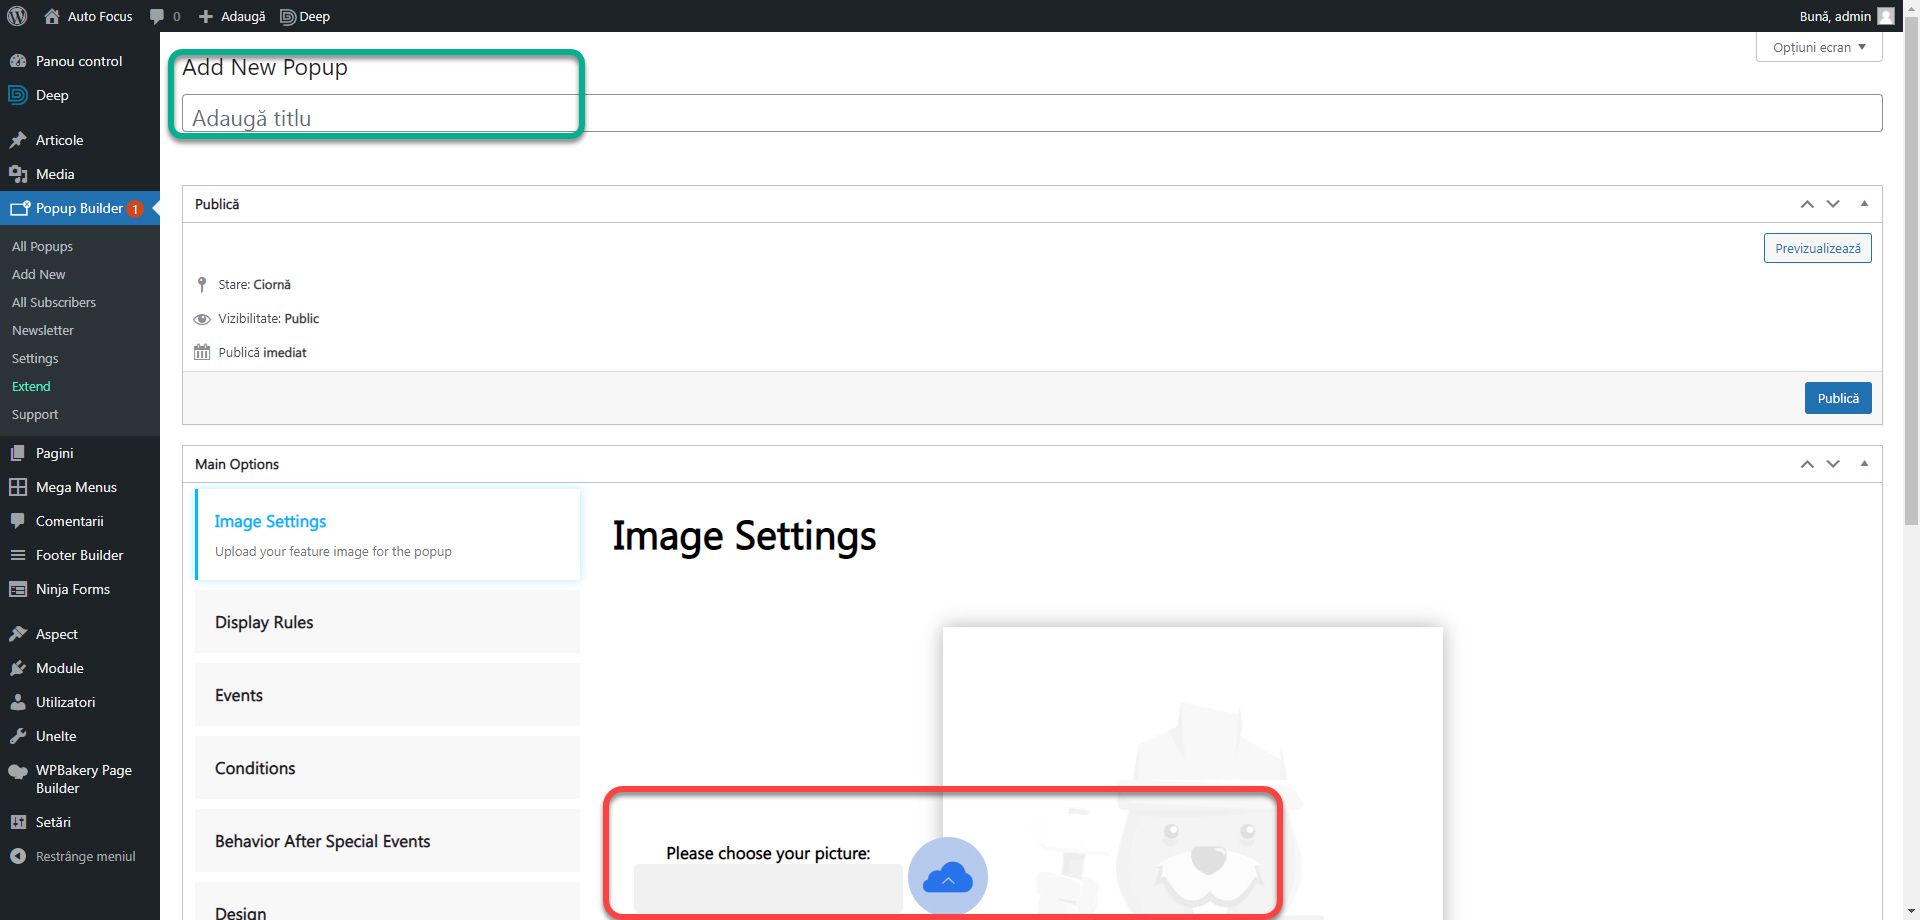
Add a title in the Add title field and below click on the cloud next to the field Please choose your picture to add the image. We have prepared a template image that you can download here.
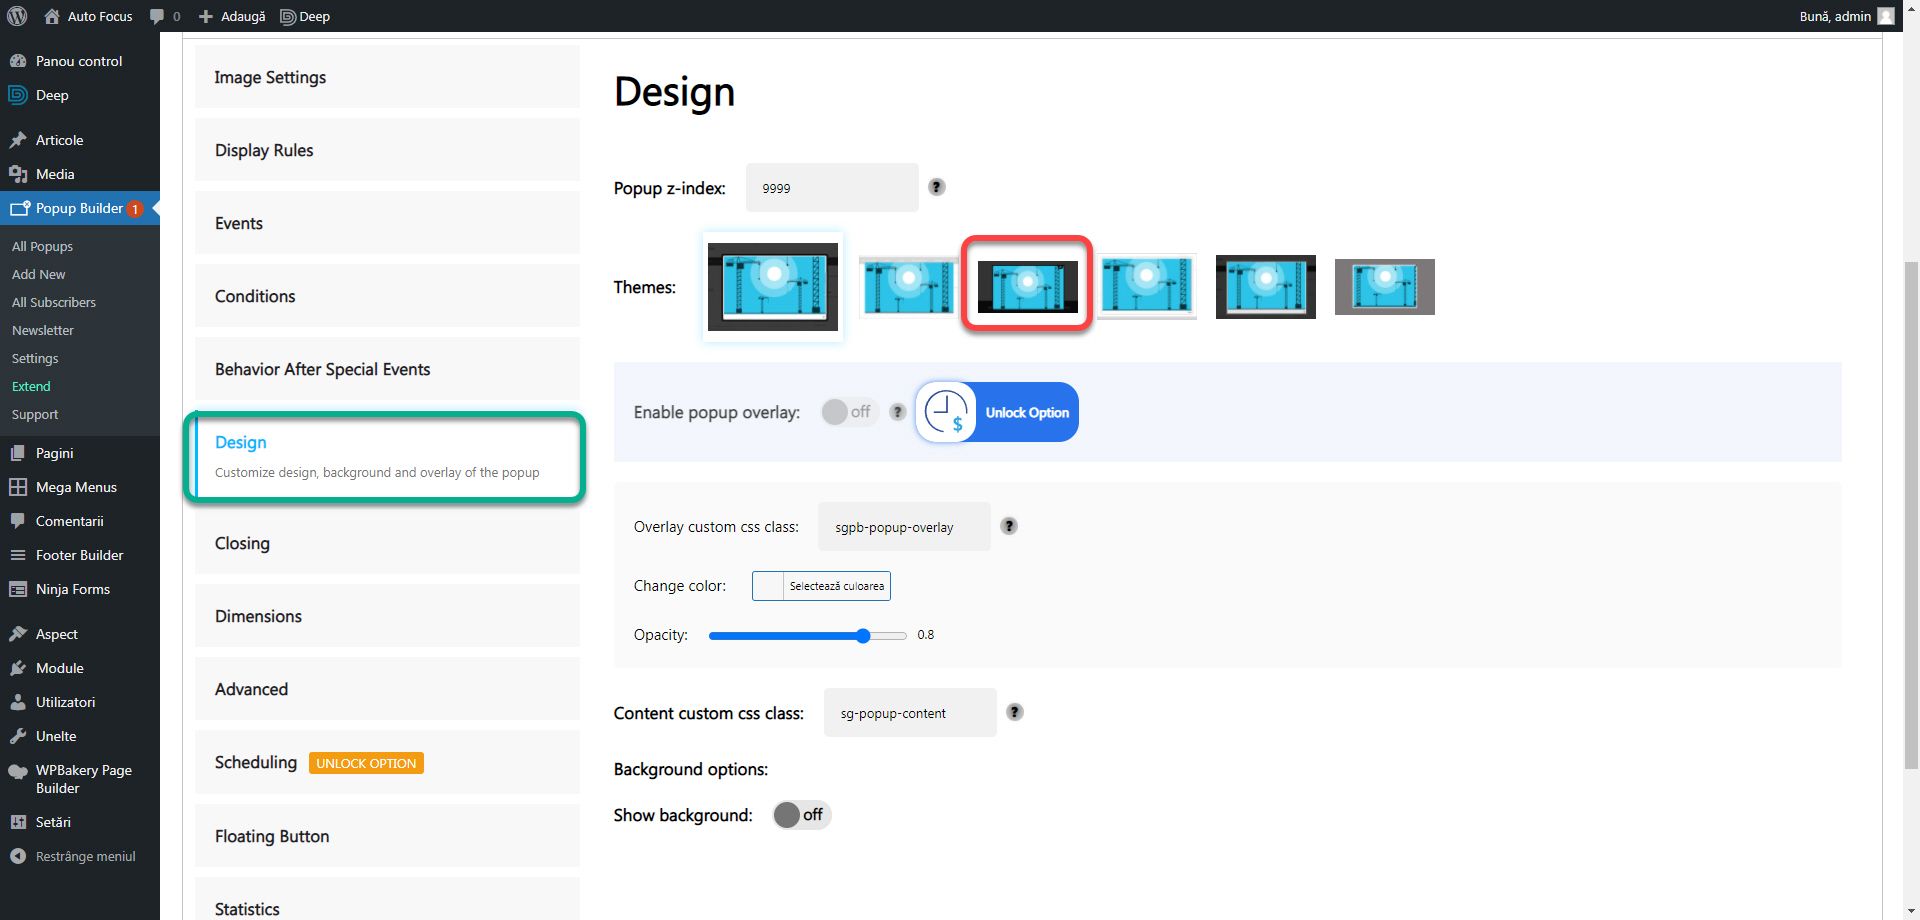
On the right there are a number of tabs with options. From the start the popup is quite well configured. We will make some customizations to familiarize you with the most important settings. Click on Design and choose a theme from the Themes section. I recommend the 3rd.
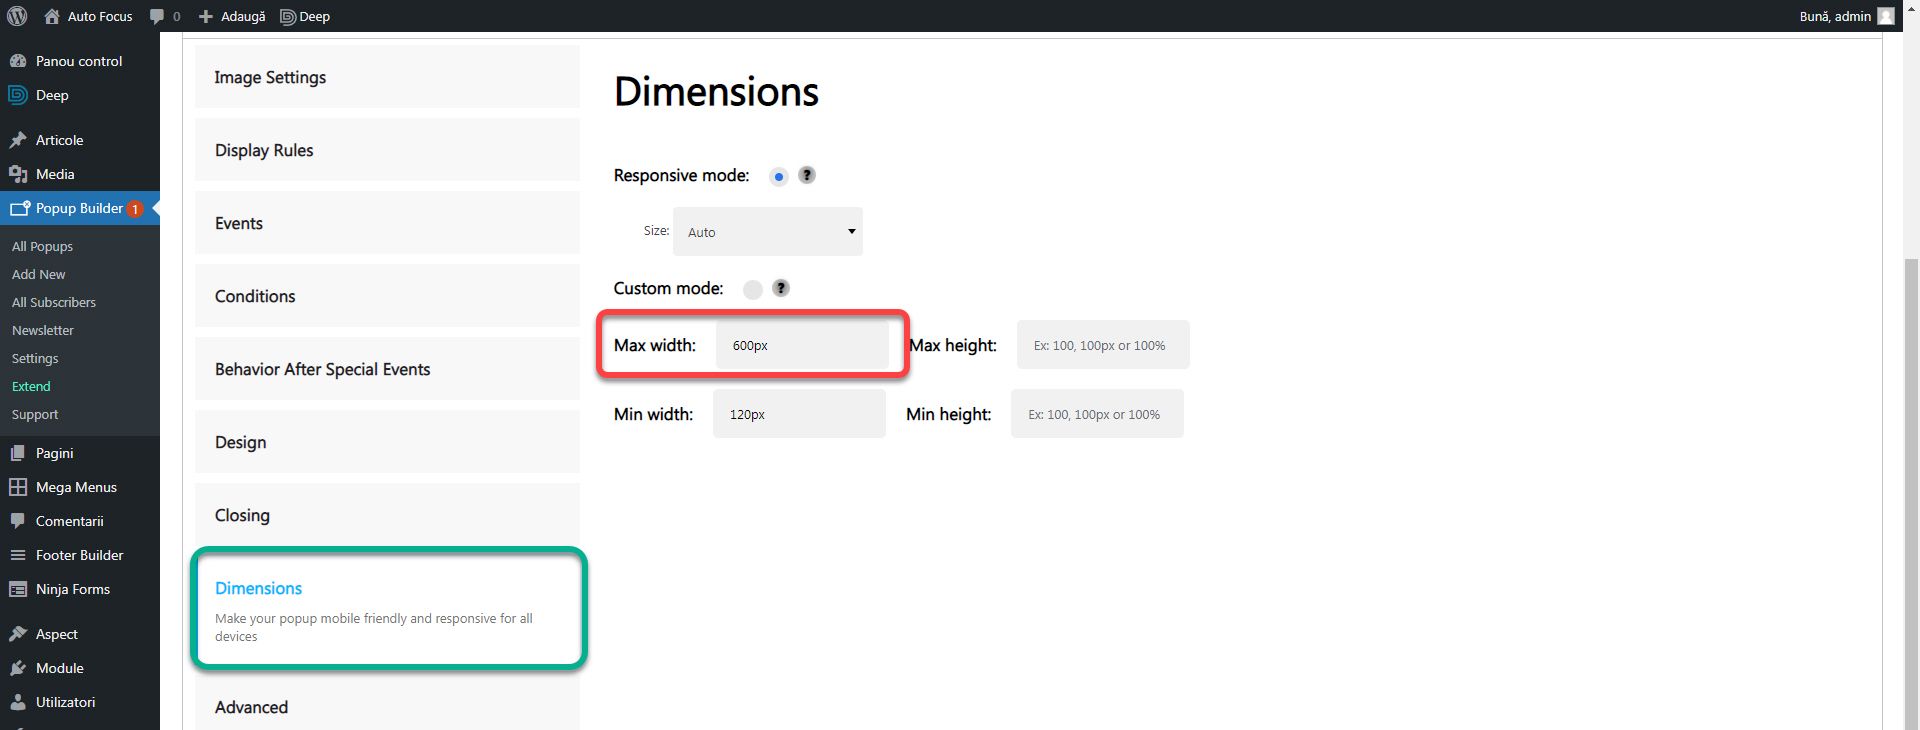
In the Dimensions tab, set Max width to 600px to keep it looking nice. Otherwise the popup will take the size of the image and could cover the entire screen.
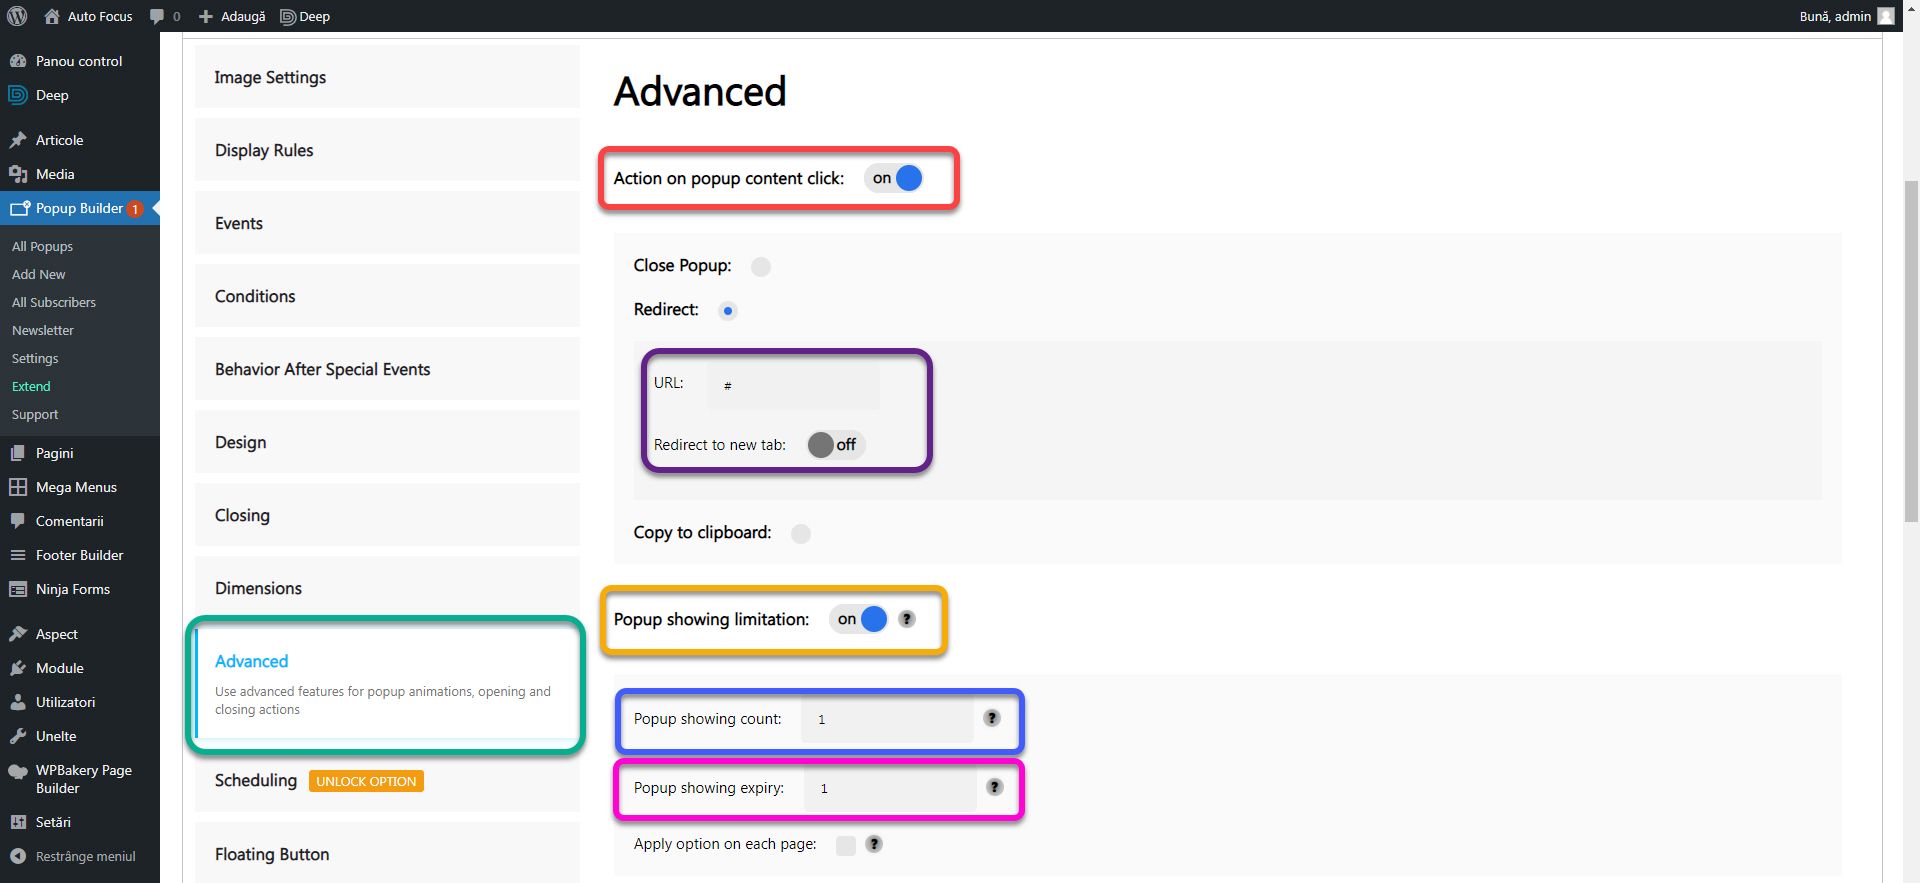
In the Advanced tab, there are several actions that can take place. Action on popup content click performs an action when the popup is clicked. Check Redirect to choose a url to go to. Popup showing limitation dictates how often the popup appears. Check it so that it does not appear more than once for the same user. Popup showing count sets how many times to appear again Popup showing expiry after how long it can appear again (in days). Set both to 1 so that the popup appears to the same user only once a day.
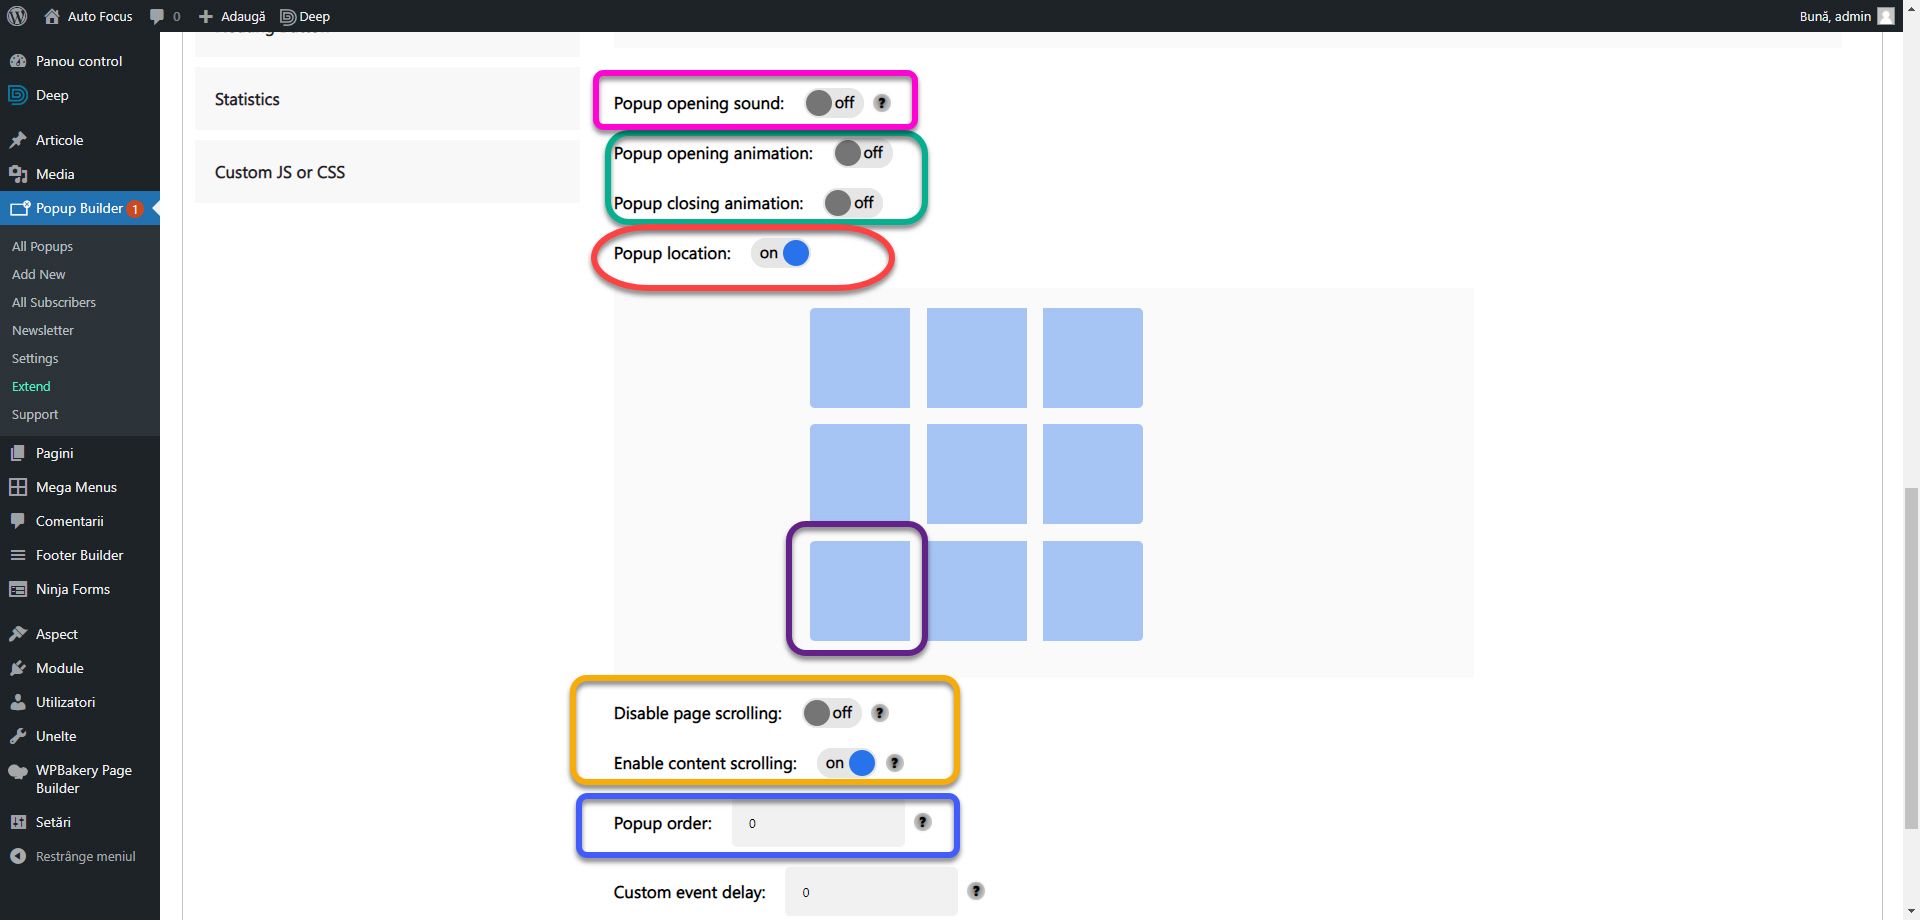
You can add a sound when opening the popup using the Popup opening sound option. There is a predefined one when activated. Using Popup opening animation and Popup closing animation you can set animations at opening and closing respectively. Click on Popup location and select the bottom left frame. It sets where the window appears on the screen. The Disable page scrolling option makes the website no longer navigable until the window is closed and Enable content scrolling allows you to scroll inside the popup window. Popup order sets the order in which popups will appear if you have multiple enabled.
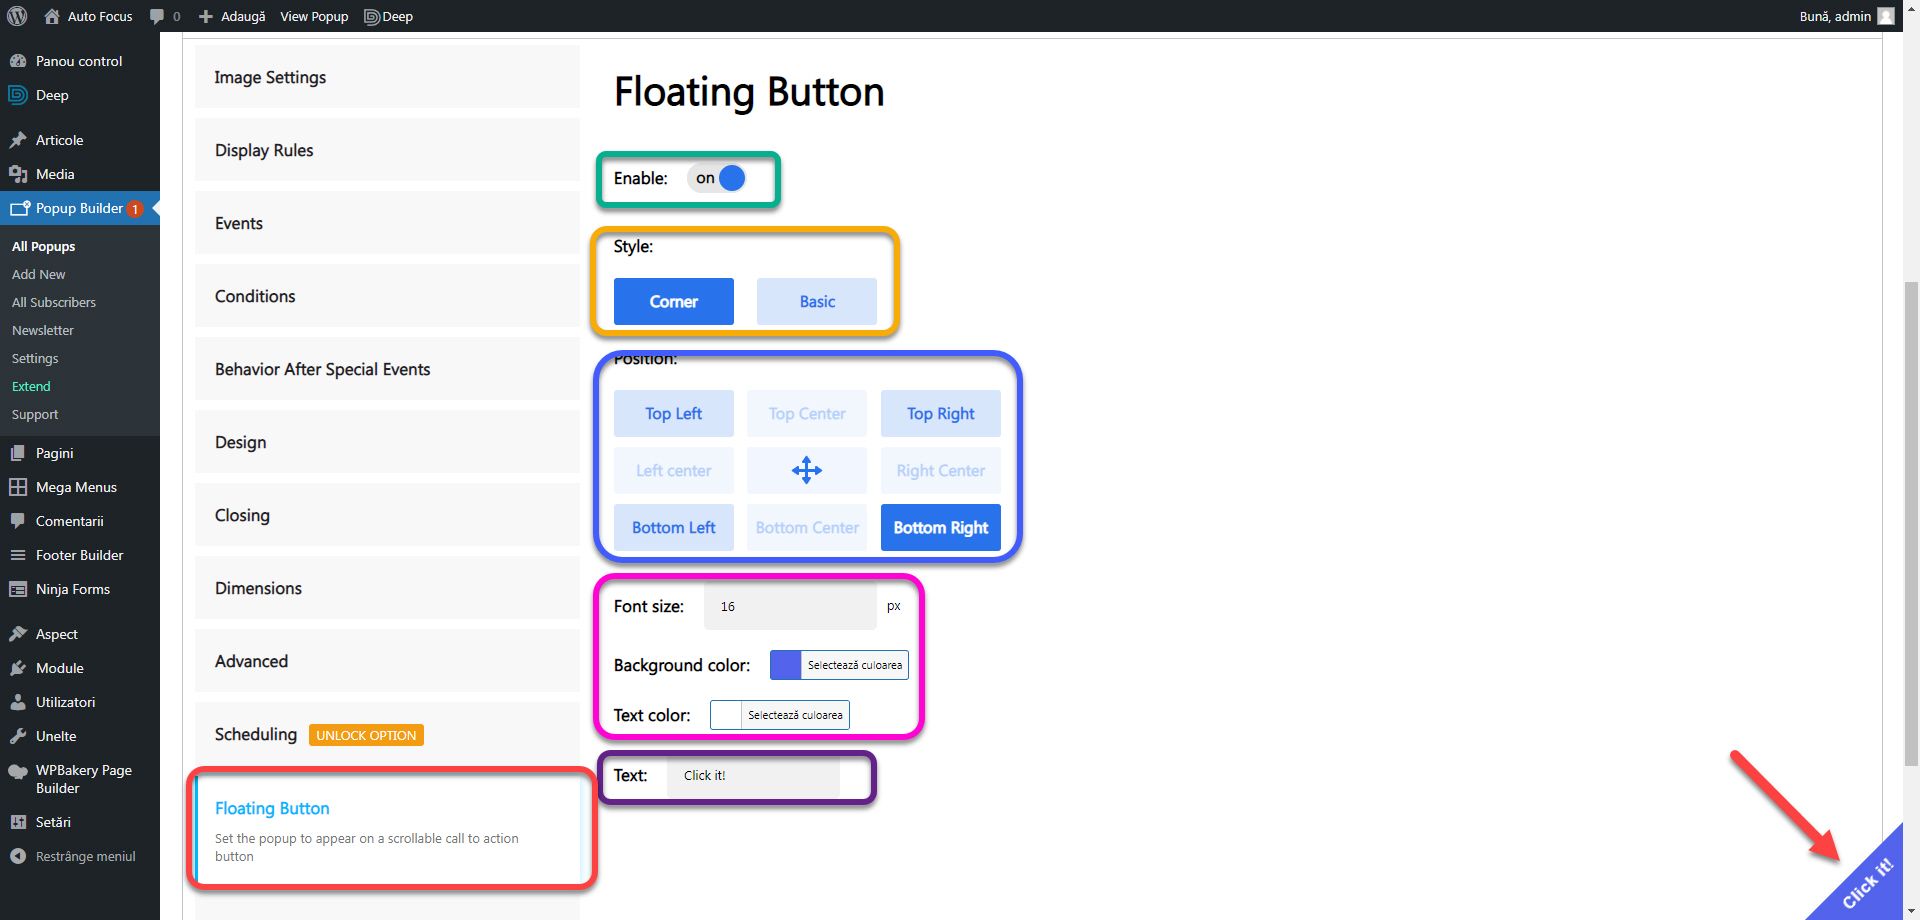
The module allows you to add a floating button in one of the corners of the screen. Click the Floating Button tab and check Enable. Choose a style from the Style section and a position to be displayed from the Position section. You can only choose corners. Automatically the preview will be updated, including the position of the button (red arrow). The Font size field sets the text size, Background color the background color, and Text color the color of the text. The actual text is set in the Text field. This button does not disappear when the popup window is closed. So make sure you don’t block important items with it.
Click Publish to save the window.
HTML Popups
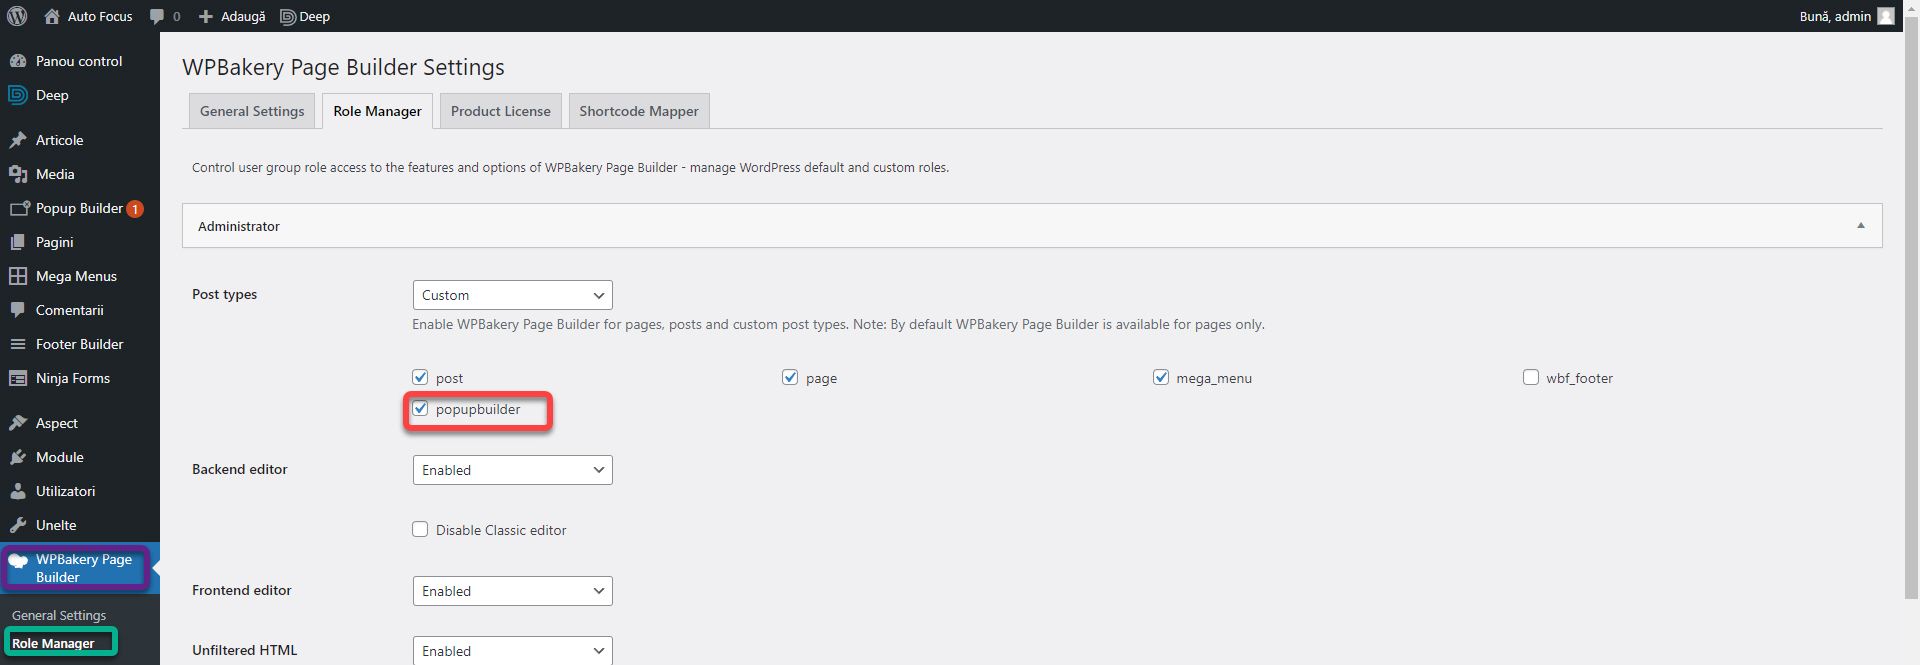
Using Popup Builder, you can integrate much more than one image into a window. Especially if you use WPBakery. To make the two modules work together, click on WPBakery Page Builder in the side menu. Go to Role Manager and check popupbuilder. Click Save Changes.
Create a new popup, this time HTML.
Click on the Backend Editor to activate the WPBakery editor. Now you can build the window just like any page of the website.
Popup Builder is very versatile. The use of windows does not have a strictly informative role, but together with WPBakery you can create bold navigations. For example, you can set the popup to appear only when the user clicks on an item. Go to the Events tab. In the Event field, change from On Load to On Click. In the Options field, select Custom class and in the Custom Class field, create a class. You can add this class to any WPBakery element. The window will open when the user clicks on it.
Cookie notices
Any website must display warnings about the use of cookies and give the visitor the right to accept the policy or not. Although the popup builder does a pretty good job, the GDPR Cookie Consent module has all the functionality you need from the start, free of charge.
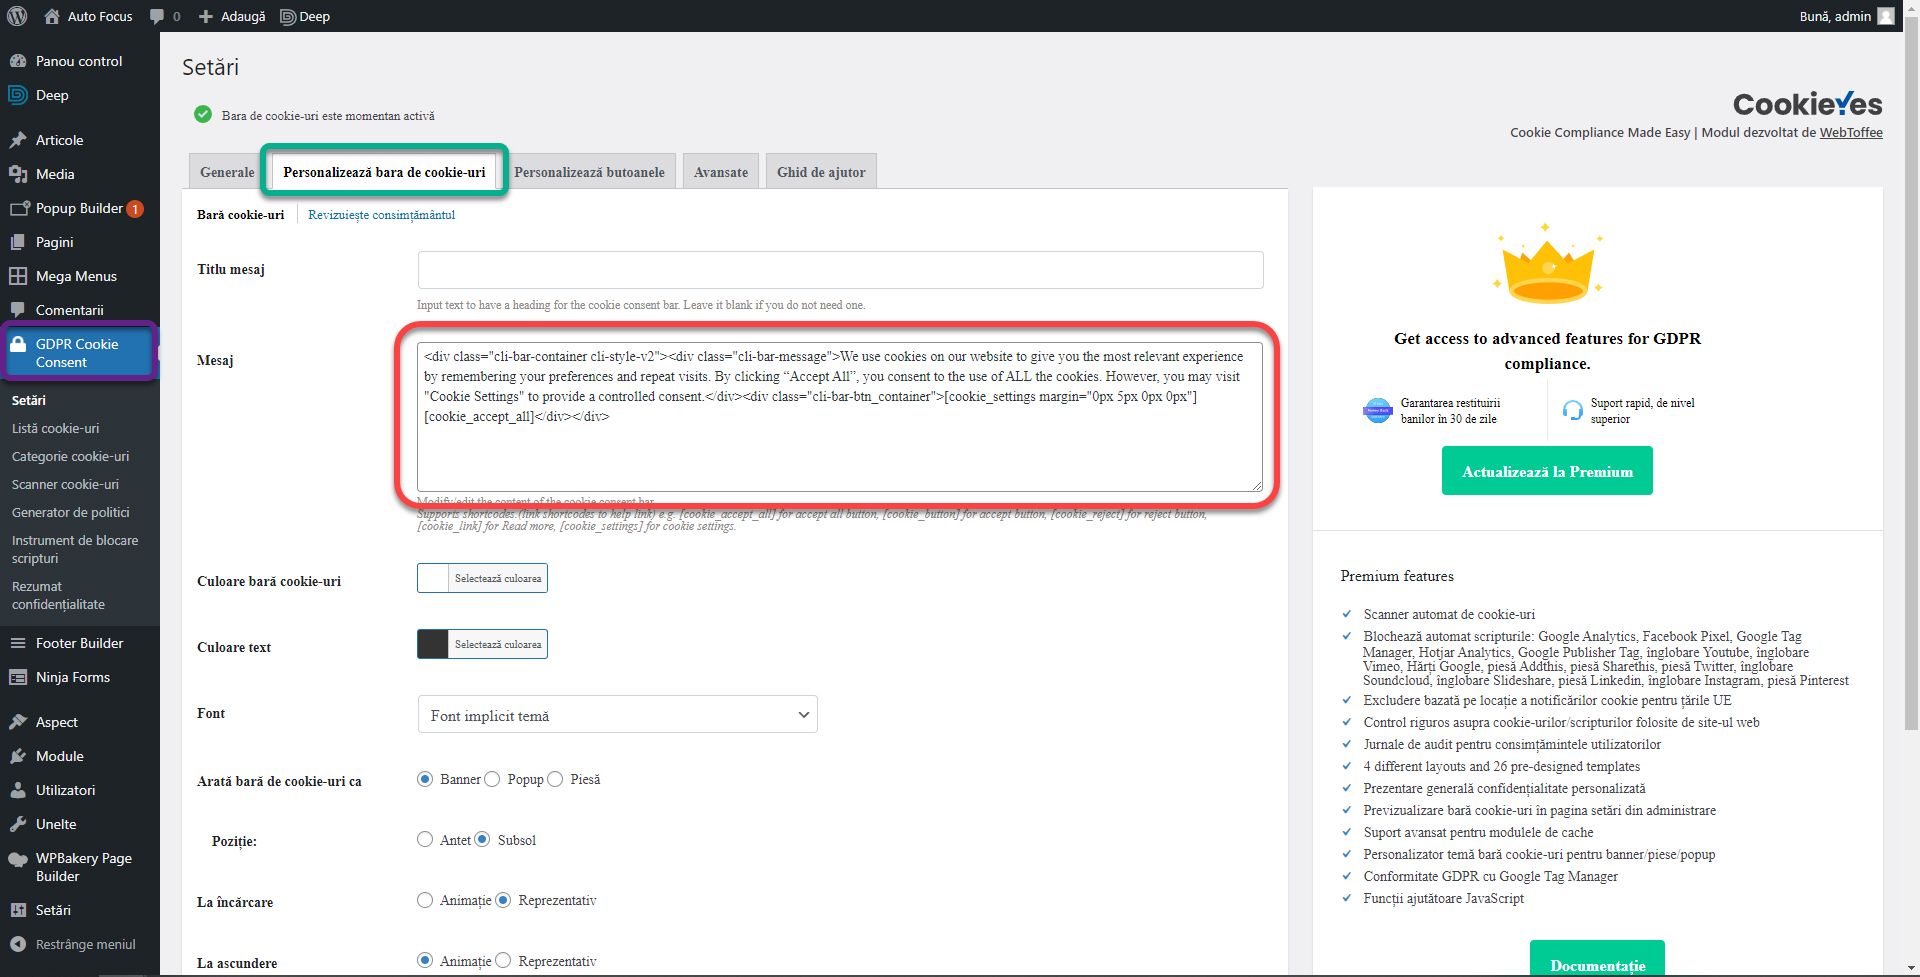
The use is quite simple. After installing and activating the mode, click on the new button in the GDPR Cookie Consent sidebar. Go to the Personalize Cookies bar tab. Here are a number of customizations you can make. You need to change the text in the Message field to an appropriate one. Inside you will find several html tags that the module uses to structure the information. The codes [cookie_settings margin = “0px 5px 0px 0px”] and [cookie_accept_all] represent the respective acceptance buttons. By moving these codes, you change the order of the buttons and by deleting them you stop displaying them.
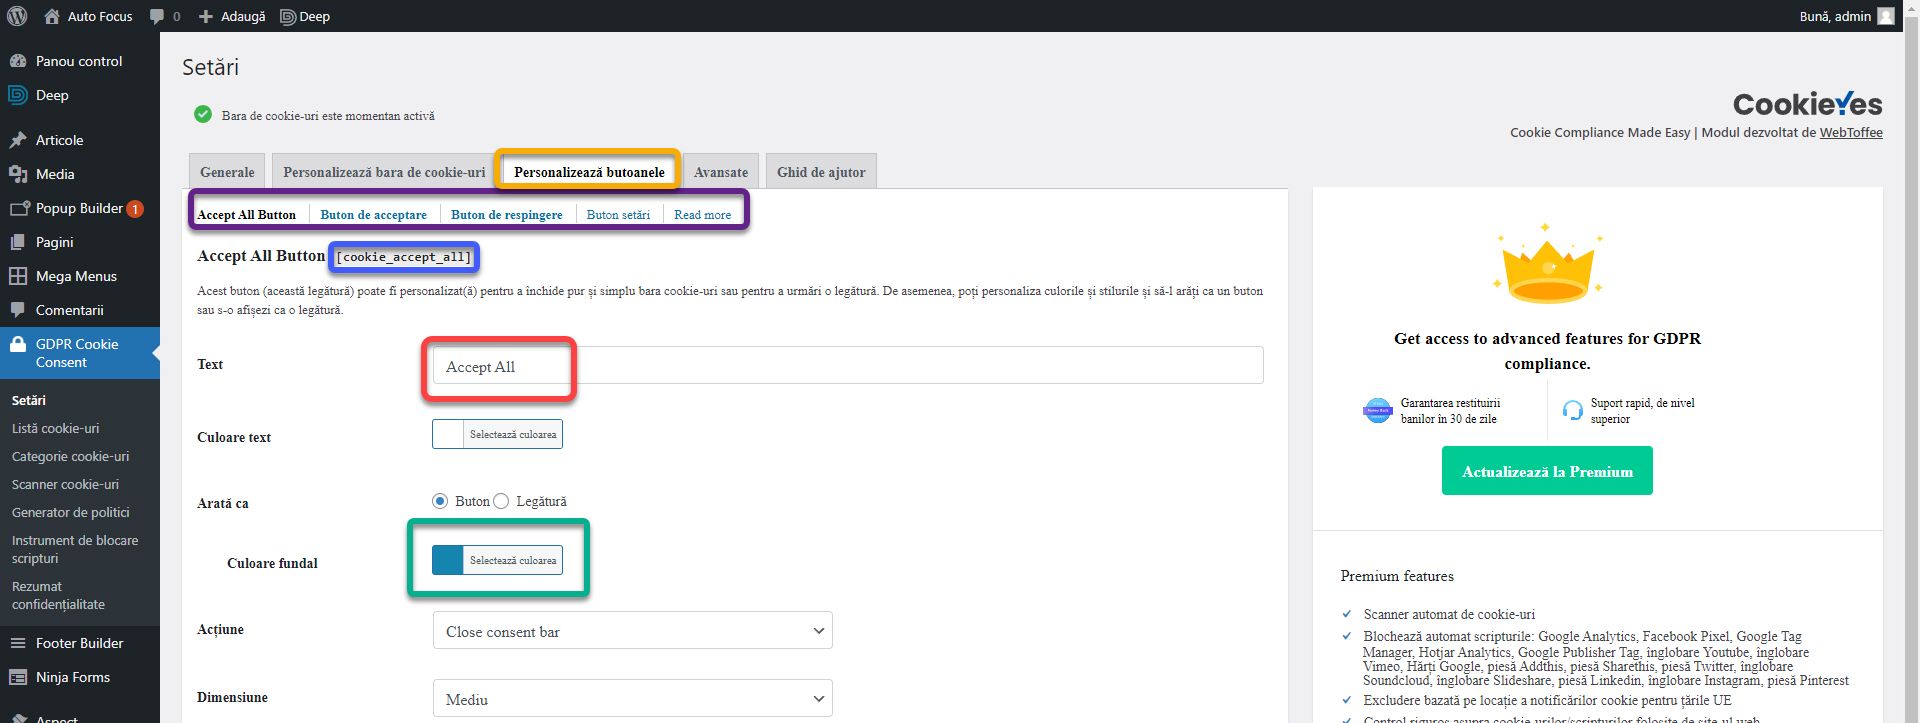
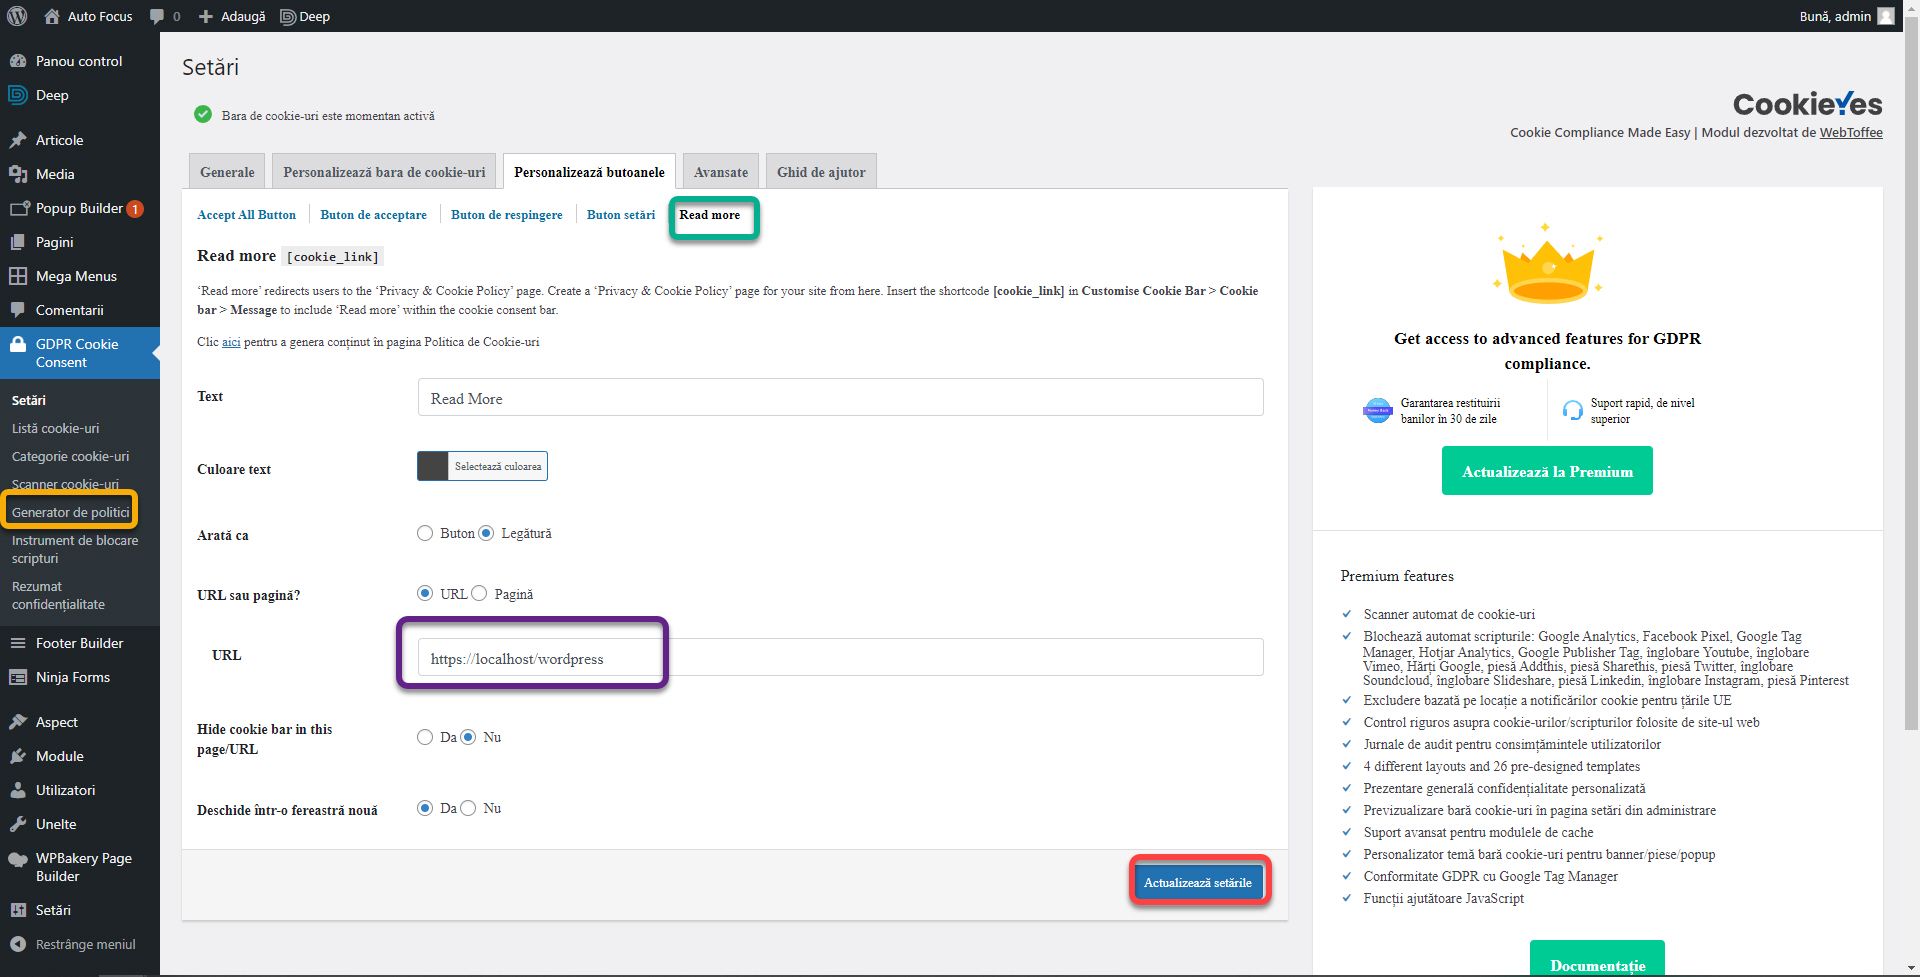
Click Customize Buttons. Here you will find a list of subtabs (purple box) representing the types of buttons available. Next to the title you will find the code that you can use in the message field to display the button. Each button has a number of customizations. You can change the text of the button in the Text field. I recommend changing the background color with a more pleasing to the eye. In this case, the main color of the website (#1584AF).
All buttons buttons have the same types of settings except the Read More button. It by nature needs a link set to the cookie usage policy in the URL field. Click Update settings to save the changes and then click the Policy Builder option in the side menu.
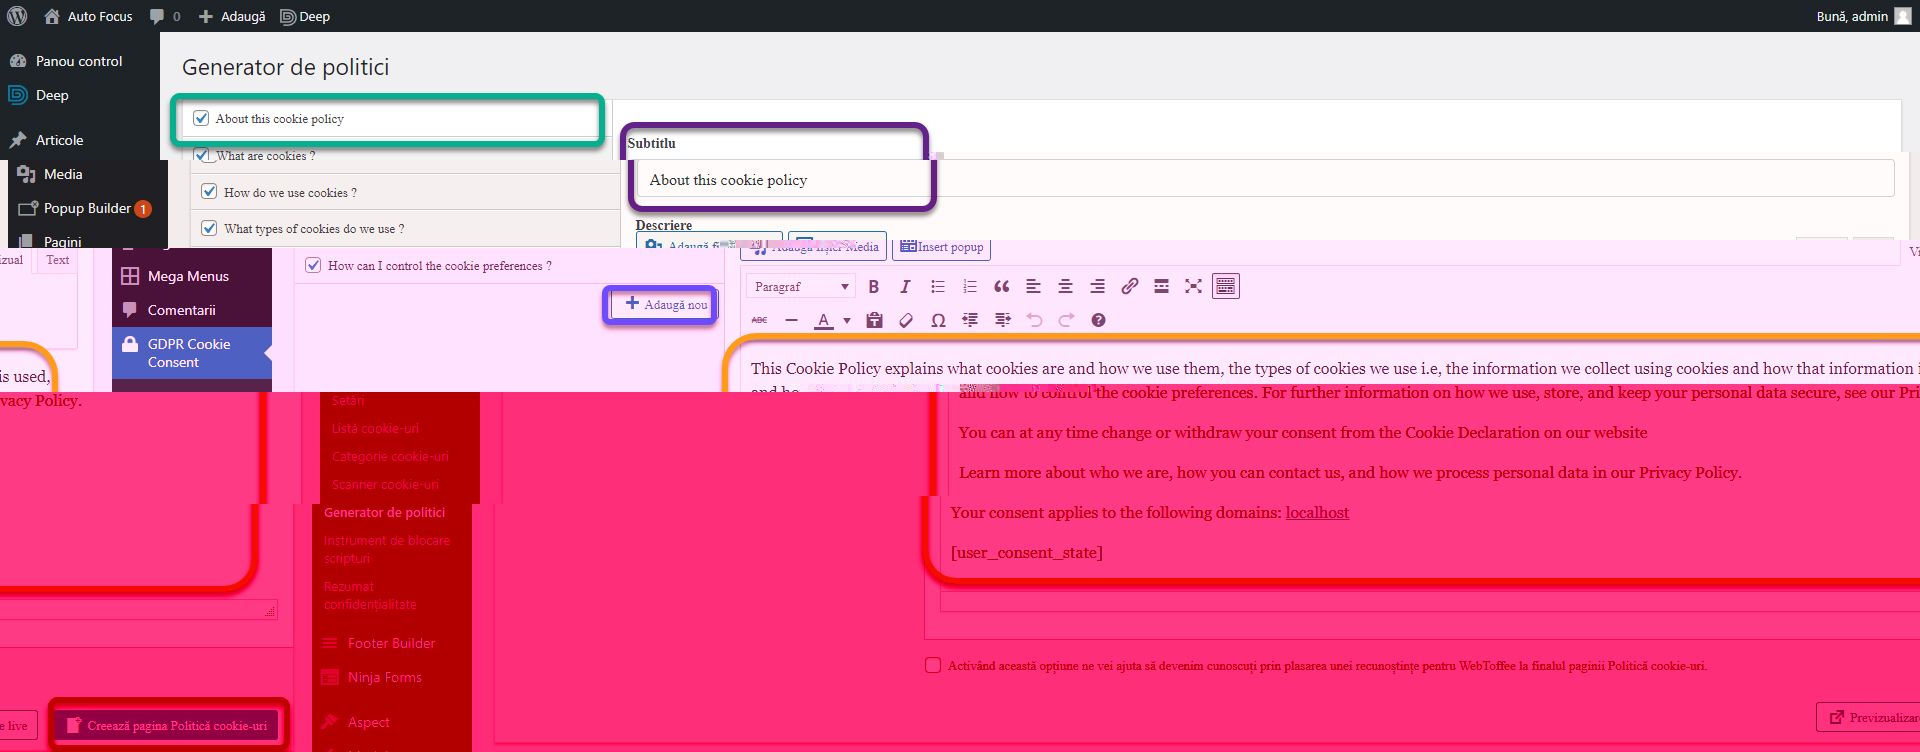
The module allows the automatic generation of cookies policy. In the list on the left you can select the desired article to edit the subtitle and description. You can uncheck an item from the list to hide it and add a new one by clicking the Add New button. Click Create Cookies Policy page to generate the WordPress page.
Of course, the module also offers some options such as listing the use cookies or blocking certain scripts. There is no need to bother with them at the moment, requiring advanced knowledge.
If you are confused or need help, I am waiting for you on the SenDesign Community Facebook group!


