How to create a website #9: Mobile optimization
04/11/2021
How to create a website #11: Popup windows
19/11/2021
How to create a website #9: Mobile optimization
04/11/2021
How to create a website #11: Popup windows
19/11/2021How to create a website #10: Contact forms
Many times in a website you need to collect data. Whether it is registrations, requests for quotes or simple contact methods, any website needs forms.
Creating a form
Ninja Forms is a free module through which you can easily build contact forms. Install the plugin by any method you want, more details in the second article in the series. A new button will appear in the left menu. Click on Ninja Forms.
Here you will find a list of existing forms (green box). Ninja Forms automatically creates a form but we will ignore it by creating a new one. Click Add New.
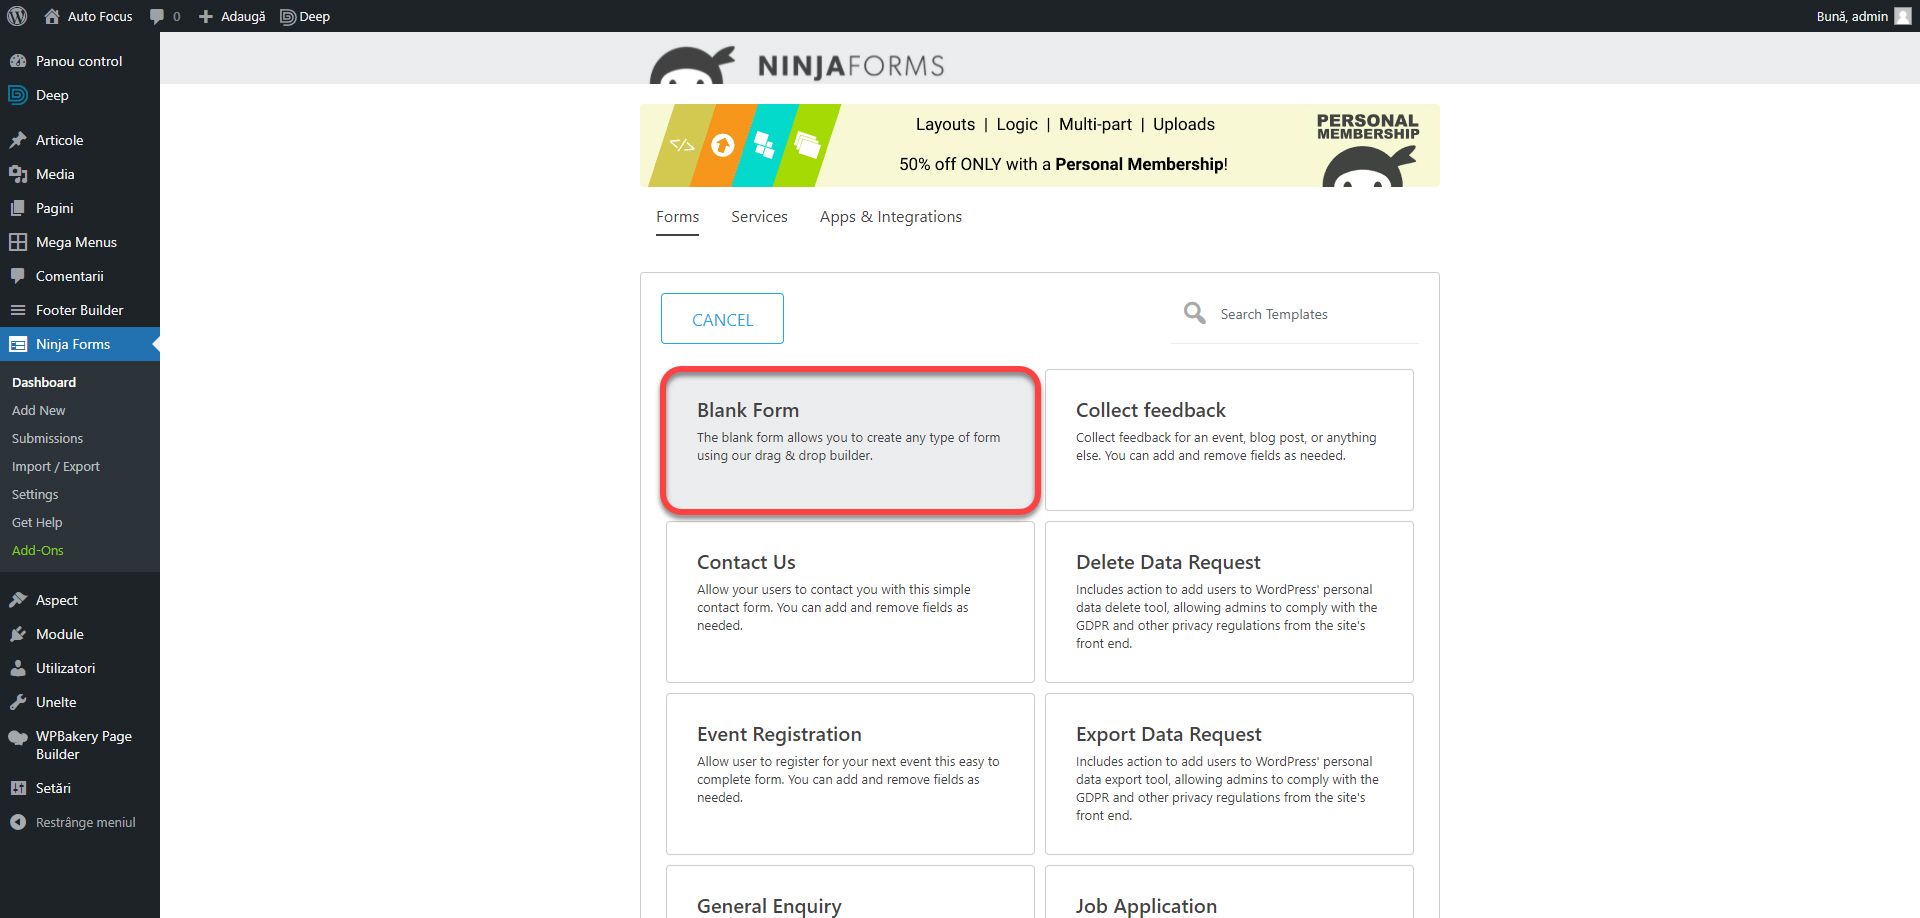
Here you will find a list of templates to choose from depending on the case. Click on Blank Form.
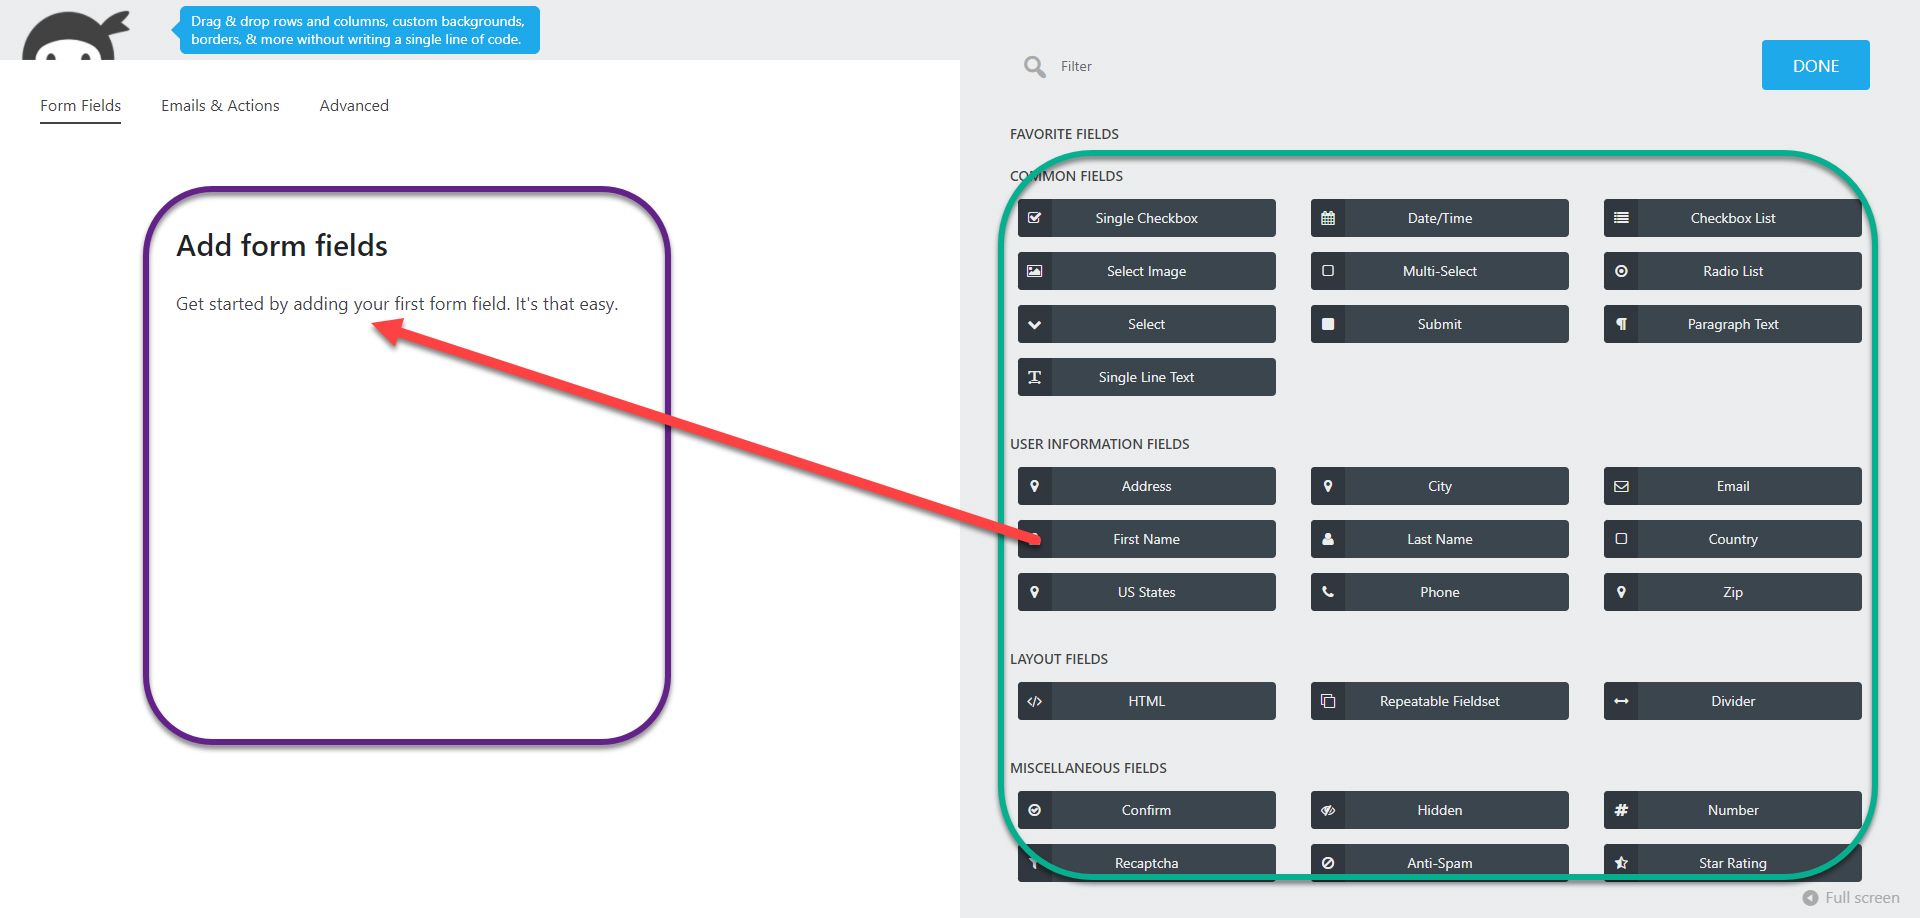
On the left (purple box), there is the form with its elements. On the right (green box), there is a list of fields from which you can add. To add a field, either tap it or drag it to the desired position.
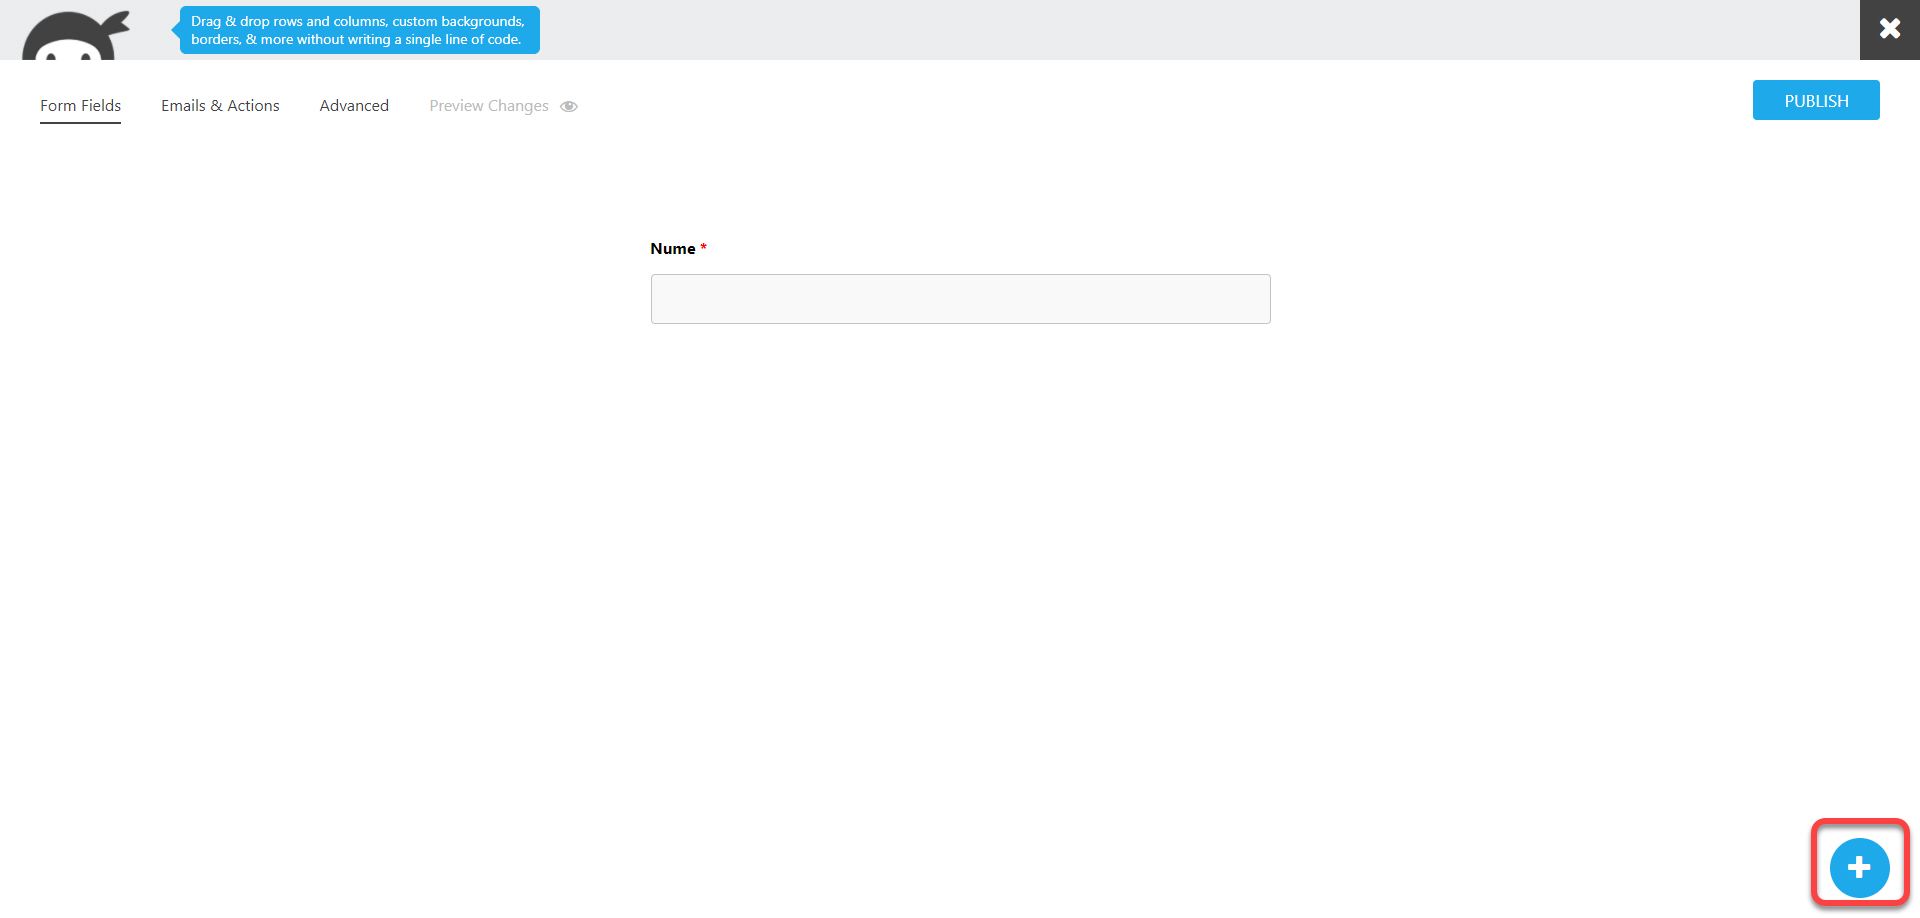
Add the First Name block and click on it. In the Label field, set which text to appear above the form field. The initial text is First Name, replace it with Name. The Required Field check box makes this field mandatory in order to submit the form. That is, no form can be submitted if the Name field is empty. Check this option and click on Done. Optionally you can add a new Last Name field and name it first. Many forms require a separate first and last name, which I consider absolutely aberrant. My recommendation is to leave a single field called Name unless you have a specific need.
Click on the floating plus in the lower right to add a new item.
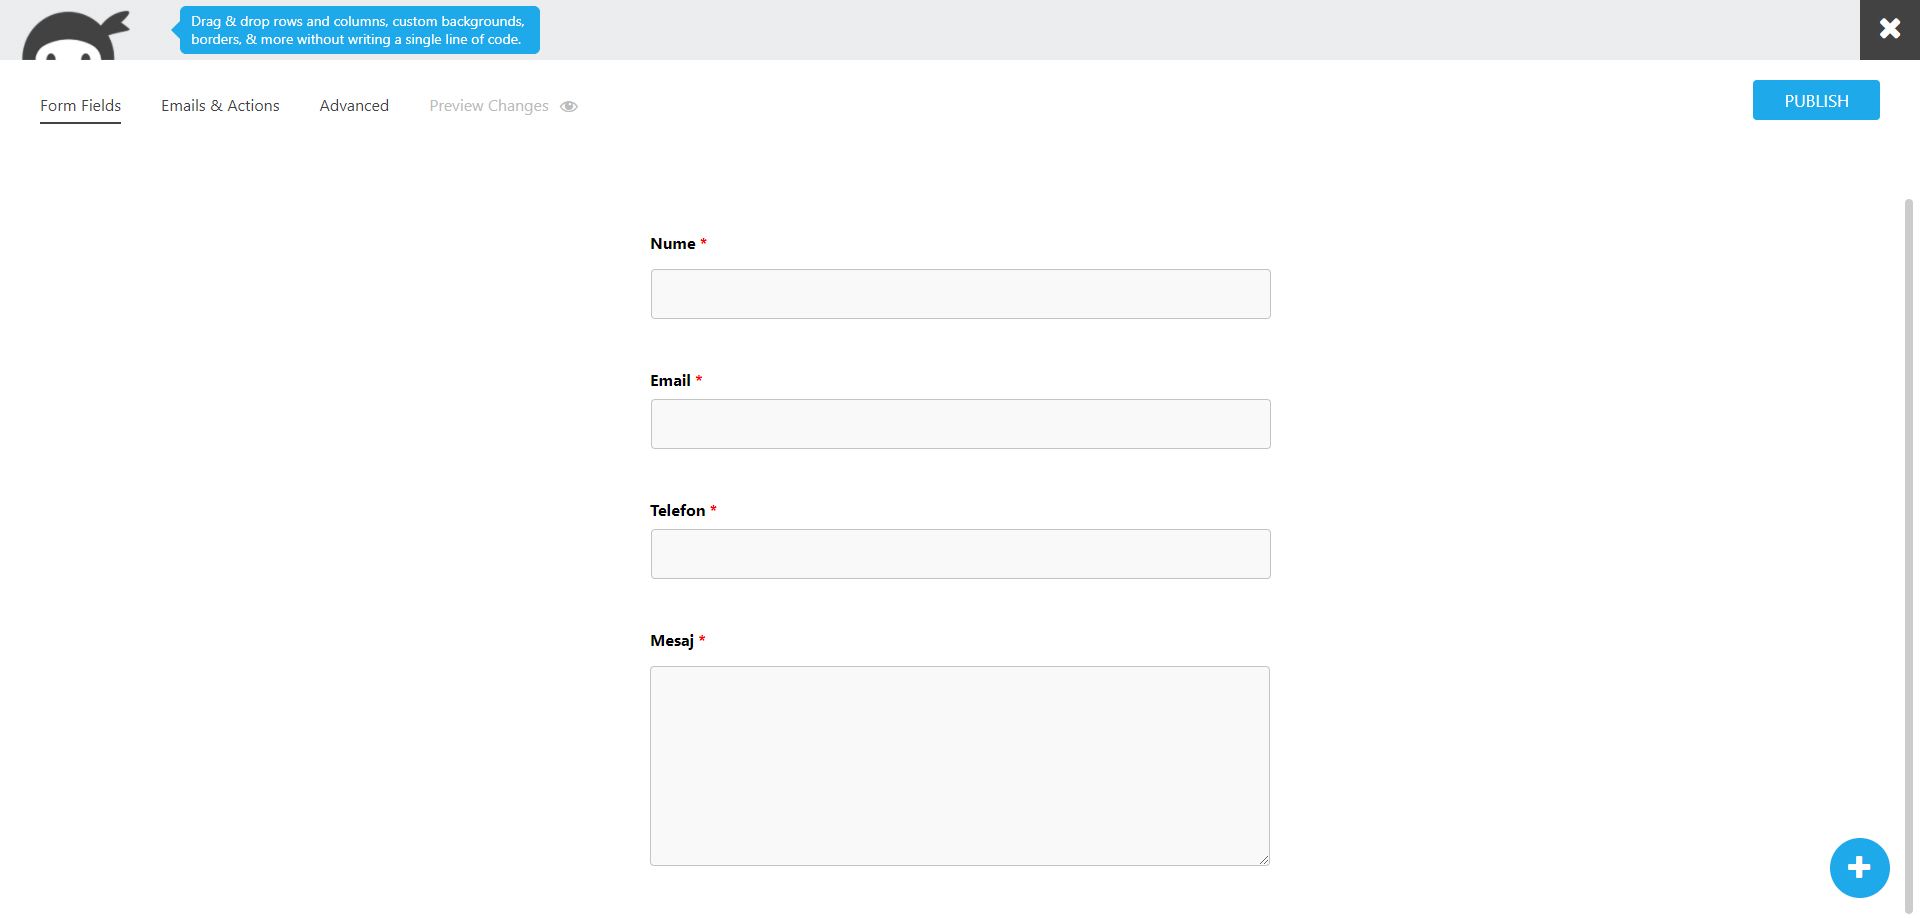
Add the Email, Phone, and Paragraph Text fields. Paragraph text is a field where long texts can be added on several lines. Unlike the other elements that are actually Single Line Text. All of these fields must be required.
In this form, we collect your name, email address, phone number and a message. When you collect personal data or data that may help identify an individual, you must collect their consent under GDPR. More details here.
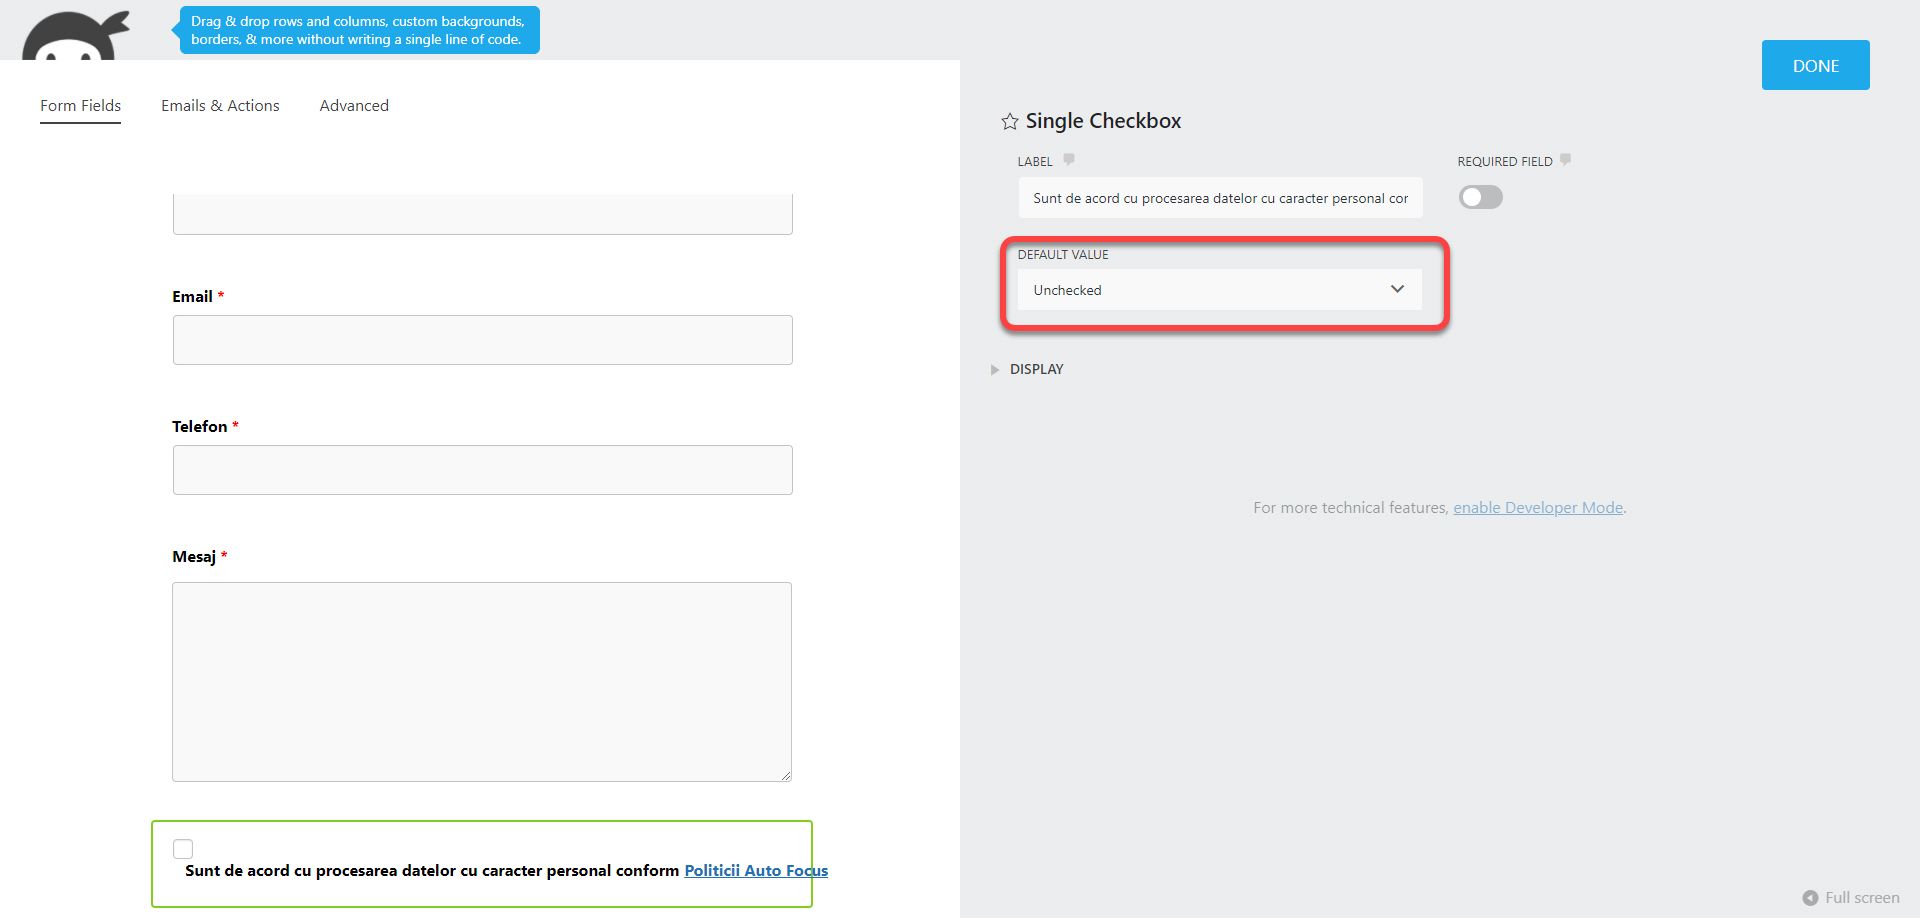
Adds a new Single Checkbox block, mandatory with the text I agree to the processing of personal data in accordance with the <a href=”#”>Auto Focus Policy</a>. The HTML tag in this text is used to create the link to the page with the data processing policy. In our example we don’t have such a page, so we just put a simple # instead of the link. In the Default Value field of the Single Checkbox you can choose whether the box is checked from the start or not. I recommend leaving the value unchecked.
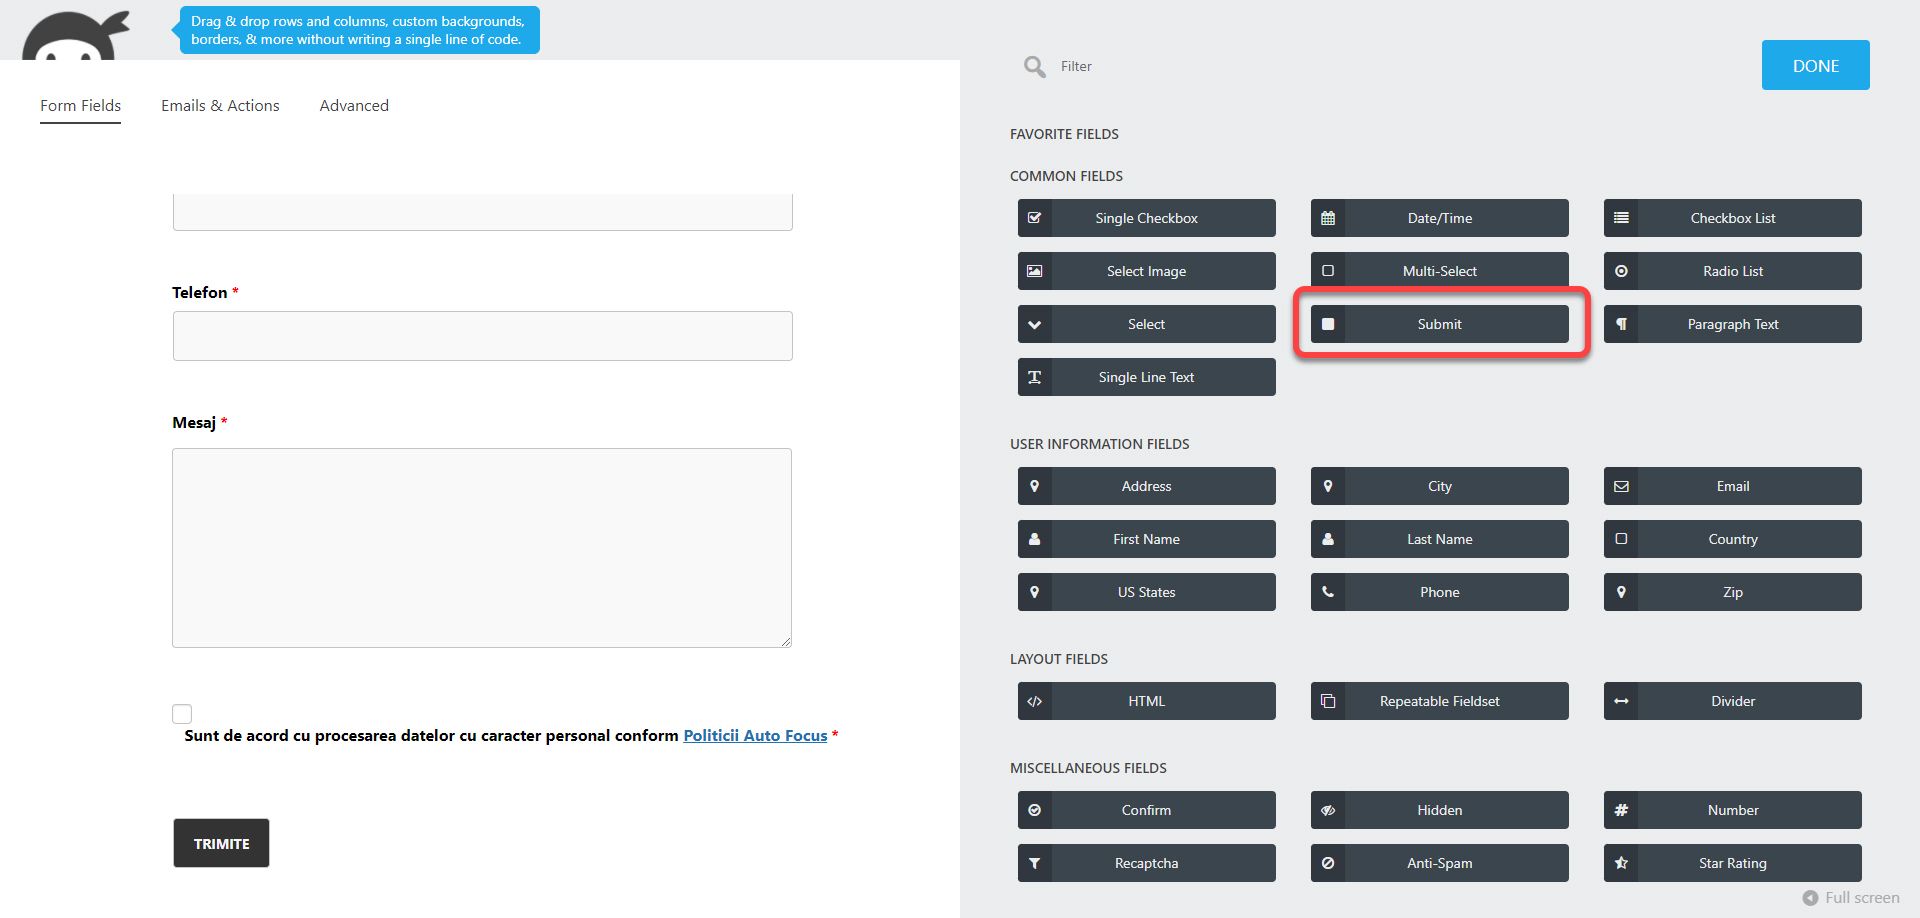
Only one item is missing from our form: the Submit button. Add a new Submit block.
To delete a field, place the cursor on it. A wheel will appear on the right side. Move the cursor over it and the delete option will appear next to the duplicate option.
Configuring Actions
Click on Email & Actions. Here are the actions that the form completes after the Submit button has been clicked. The three types of actions that are already defined are sufficient. Click on Success Message to open the configuration window. It displays a message below the form after it has been sent. In the Message field. The Action Name field only renames the action. Website visitors will never see that text. All actions have this option.
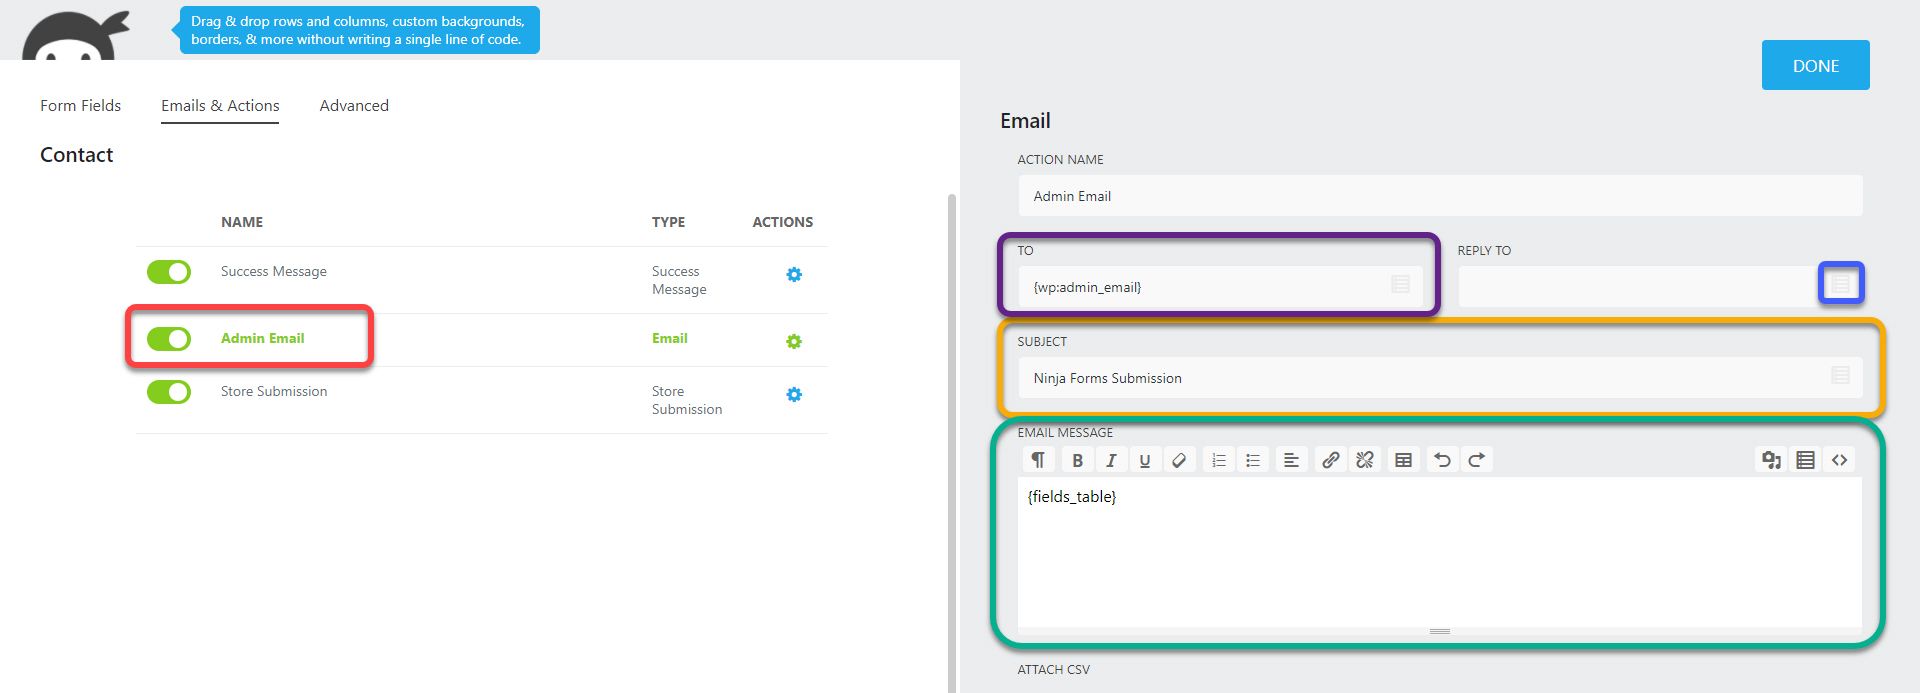
Click on Admin Email. This action sends an email to a specified address each time someone fills out a form. In the To field is the address to which the emails will be sent. The variable {wp:admin_email} specifies the email address with which WordPress was installed in the first article in the series. You can change it with a different email address. The Subject field defines the subject that the email will have and Email Message allows you to change the text of the message. The {fields_table} variable contains all the fields in the form.
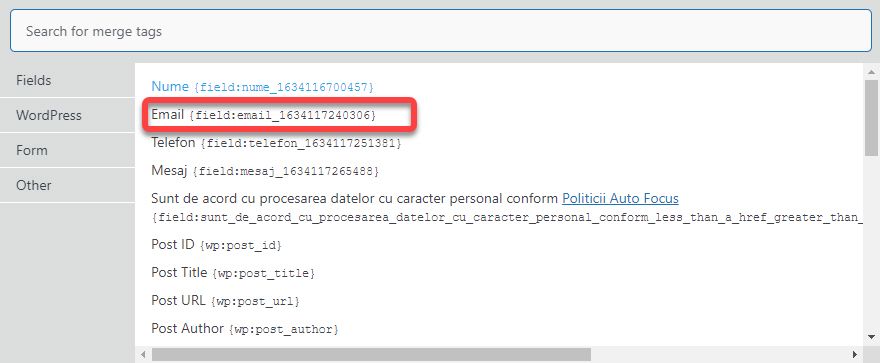
The Reply To field refers to the address that can be answered directly from the email box. That is, if someone fills out the form with the address dorel@gmail.com, and you receive an email from the website, when you click Reply from the email client, they will respond directly to the address dorel@gmail.com, not the website. To set the field to automatically retrieve the address from the form, click on the icon inside it.
From the window that opens, click on Email. The required variable will be automatically added to the Reply To field. In the same way you can add variables in any field.
The last action is Store Submission. It stores in the website in tabular format the data from each submission of this form. To disable any of these actions, you can use the checkboxes on the left. Go to Advanced.
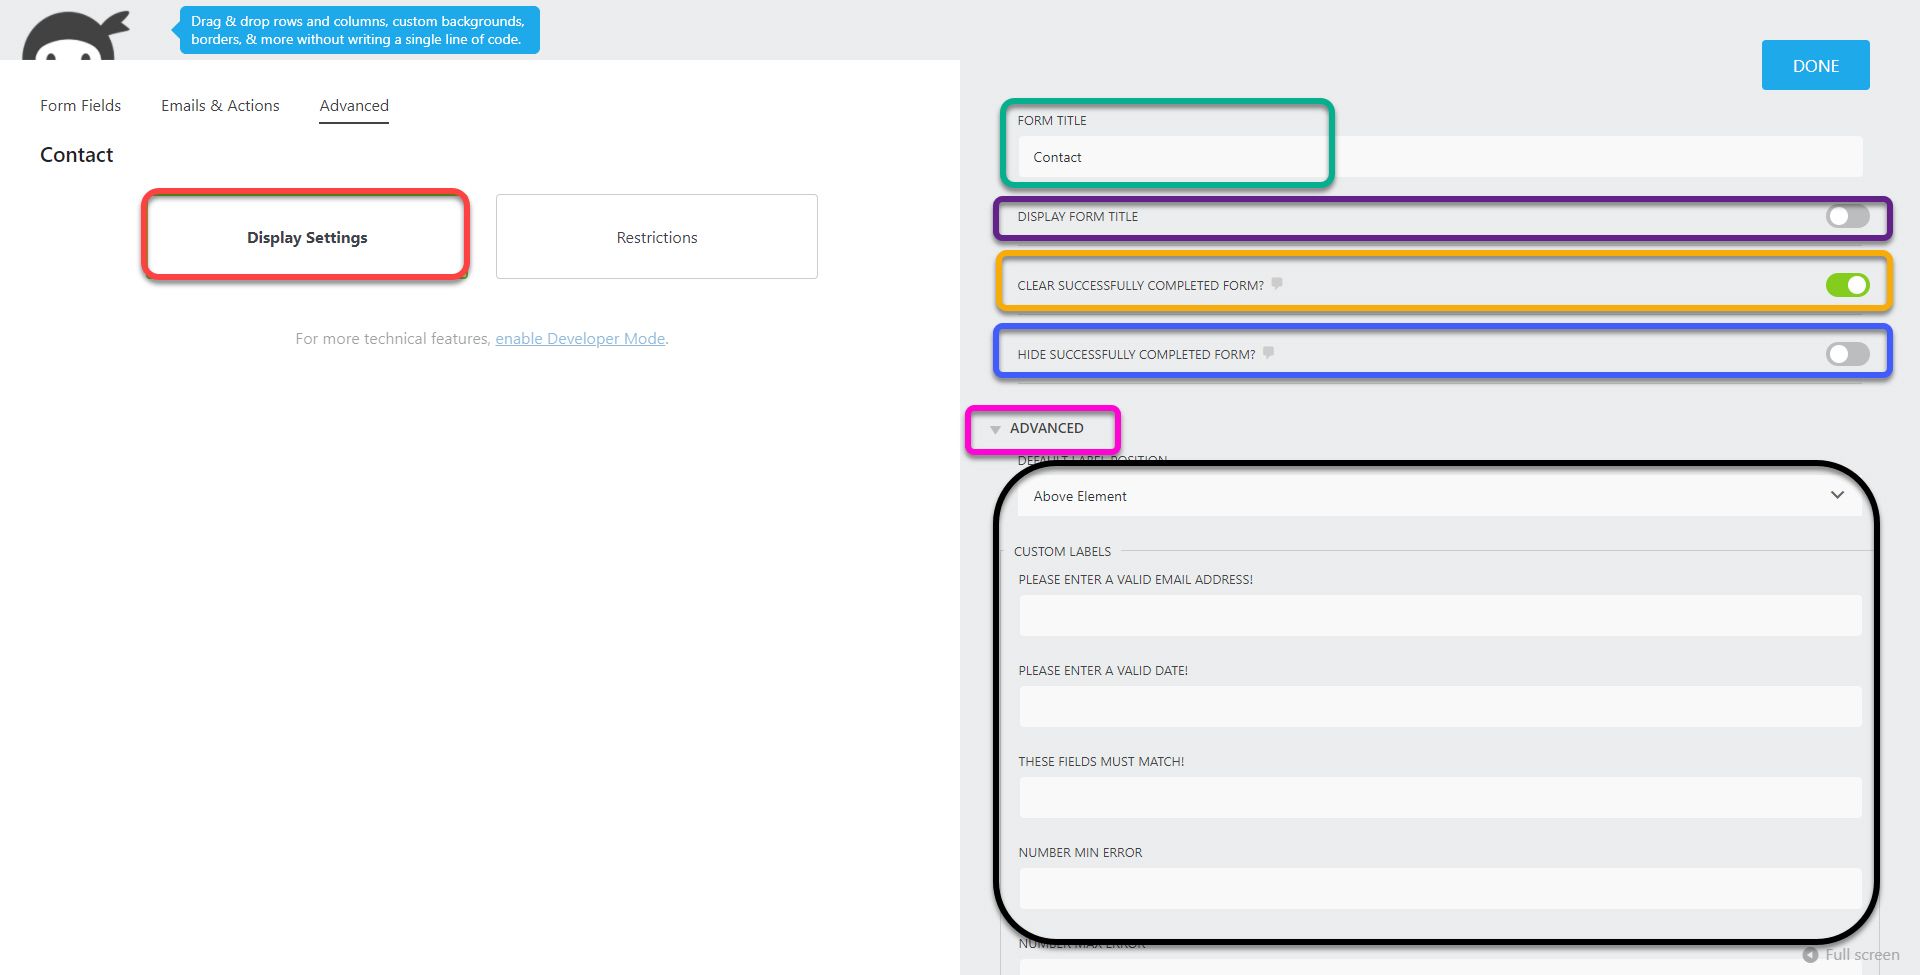
Click on Display Settings. In the Form Title field I have to give a name to the form, we will call it Contact. The Display Form Title check controls whether or not the title will be displayed above the form. Personally, I chose not to display it but it is not a rule. Clear Successfully Completed Form clears the form fields after it has been submitted. It is useful to stop users from sending it several times by mistake, so we will leave it checked. Hide Successfully Completed Form hides the form after completion. I personally unchecked the option. If you click Advanced, you will be able to modify all the messages displayed by the form,
Click Publish to publish the new form and then X to exit the window.
Using the Form
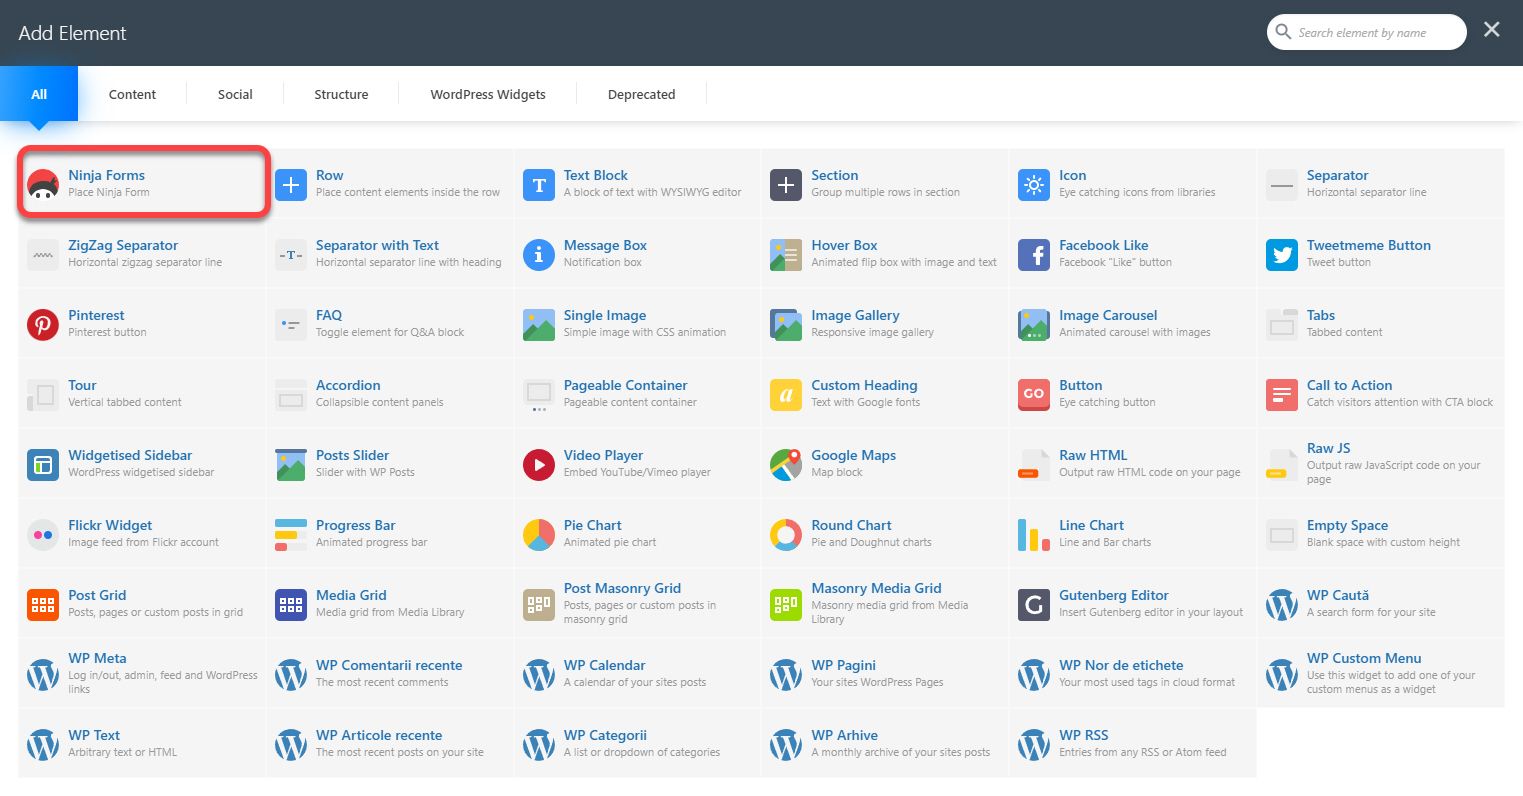
Ninja Forms has support for WPBakery. Adding to the page is easy. Just add the new Ninja Forms block from the list of items anywhere on the page you want.
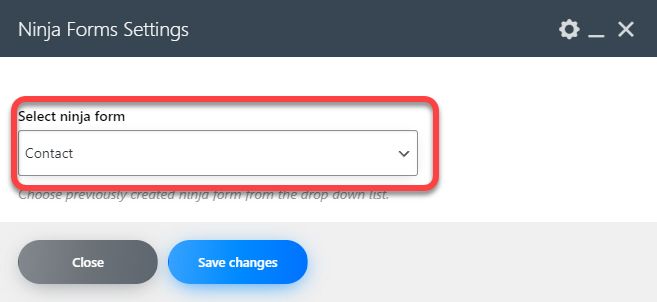
In the block settings, select the desired form from the Select ninja form field.
If you are not using WPBakery, then return to the Ninja Forms page and copy the code from the SHORTCODE section. Place this code in a text field wherever you want to display the form. Even in Widgets if you wish. If you press the cog right of a form, the standard Edit, Duplicate, Preview and Delete options will appear. In addition, there will be the View Submissions option where you will be able to see the stored data of the form, if the Store Submission action has been activated.
This is all the information you need to build forms. There are many more options and settings in Ninja Forms than I explained, but except for one specific case, you won’t need them. There are also many extensions for a fee that greatly extend the functionality. For example Layout and Styles that allows you to customize the form much more and even place the fields on columns, not just rows.
If you are confused or need help, I am waiting for you on the SenDesign Community Facebook group!


