How to create a website # 1: Installing and configuring WordPress
10/09/2021
How to create a website #3: Customize the theme
24/09/2021
How to create a website # 1: Installing and configuring WordPress
10/09/2021
How to create a website #3: Customize the theme
24/09/2021How to create a website # 2: Installing the theme and plugins
In WordPress, themes and plugins are very easy to install. You can choose from the official library or you can upload them manually from other sources. To connect to the WordPress control panel go to domainname.ro/wp-admin where domainname is your web domain or http://localhost/wordpress/wp-admin in case of offline installation. Use the login data you set in the previous article.
Theme installation
From the library
WordPress requires a theme that will dictate its website design and basic skeleton structure such as header and footer. To install a theme from the WordPress theme library, place the cursor on the Appearance button in the left menu and click Themes.
Here you will find a list of all installed themes. WordPress comes with some basic themes already installed. Click Add new theme.
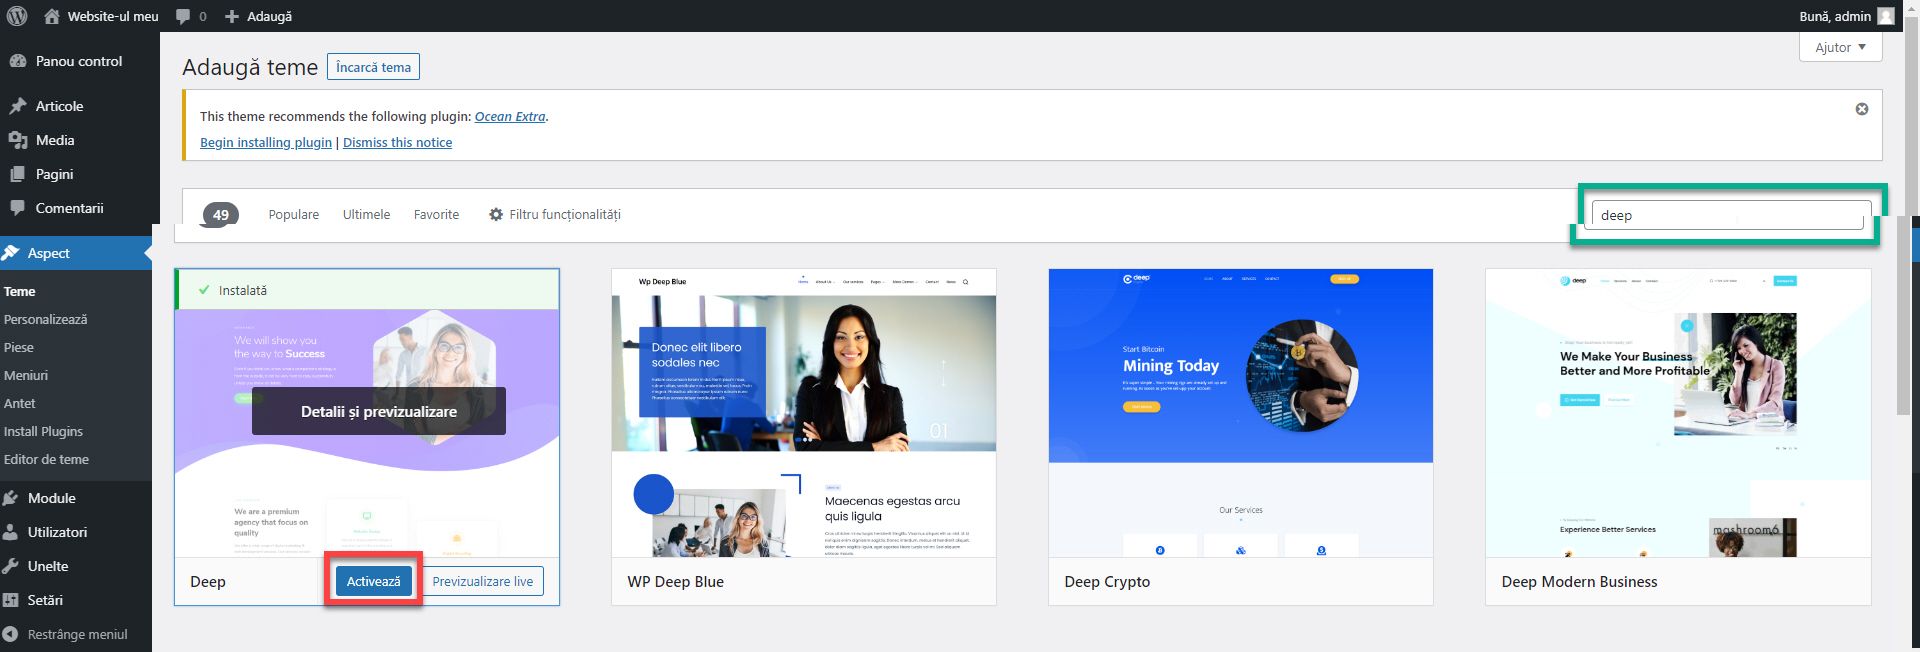
This is the free WordPress theme library. For this example, I recommend the Deep theme, which you can find using the search function. It is free, present in the library and easy to use and configure. Hover over the theme frame, and click Install. When the installation is complete, click Activate.
By uploading the files
The best themes are sold outside the WordPress library and come at a cost. After purchase, you will receive a zip archive containing the files. Go to Themes, click Add new theme, and from here click Upload theme.
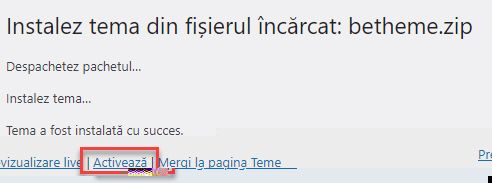
Upload the archive and click the Install Now button.
At the end, press Activate.
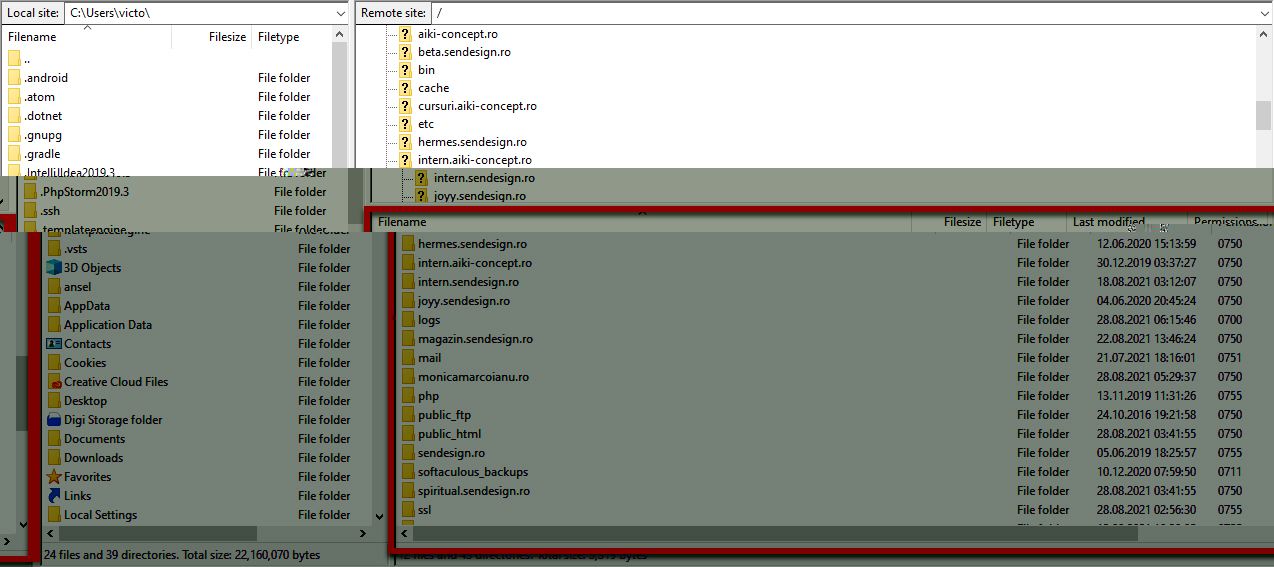
There is a second method by which you can upload themes. By transferring files directly to the server. In the email received from the hosting company, you will find FTP authentication data. For this we will need an FTP client. I recommend FileZilla which can be downloaded here. Click on Download FileZilla Client. The installation takes place normally. In the FileZilla window, enter the server authentication data received in the email. That is, the host / server address, username and password, then press Quickconnect.
Navigation is done in the lower right window. The website files are in the public_html directory. Navigate to /public_html/wp-content/themes. Here you will find the directory with your homework. Unzip the zip archive and move the theme directory here. From here, both online and offline, you can delete any theme you don’t use. For XAMPP offline websites, click the Explore button on the XAMPP control panel and navigate to \htdocs\wordpress\wp-content\themes. FileZilla or FTP transfer is not required.
To activate a theme, go to the Themes page. Place the cursor on the desired theme and press Activate. You can have only one active theme. Make sure you always have a theme installed and enabled.
Installing plugins
From the library
To install a module from the WordPress module library, click Plugins in the WordPress control panel and then click Add Plugin.
Here enter the name of the plugin in the search box and click on the Install Now button next to the plugin and then on Activate.
By uploading files
Just like in the case of the theme, go to the plugins page and click on Upload plugin. Choose the zip archive of the plugin and click Install Now.
Go to the Plugins page and click the Activate button next to the desired module. To delete a plugin, press the Delete button. A plugin can only be deleted after it has been deactivated.
The modules can also be uploaded via FTP. The method is the same as for themes, instead the directory is /public_html/wp-content plugins for the online version or \htdocs\wordpress\wp-content\plugins for XAMPP.
When installing modules, it is very possible that one of them may not work. In this case, the entire website will no longer be usable. In the absence of the control panel, use FileZilla and navigate to the module directory. Delete the module file that is causing you problems. If you do not know exactly what it is, rename all modules. Thus they will be deactivated. Now you can activate each module in turn until you find the one with problems. Once detected, you can delete it.
If you are confused or need help, I am waiting for you on the SenDesign Community Facebook group!


