How to create a website: A tutorial series
03/09/2021
How to create a website # 2: Installing the theme and plugins
17/09/2021
How to create a website: A tutorial series
03/09/2021
How to create a website # 2: Installing the theme and plugins
17/09/2021How to create a website # 1: Installing and configuring WordPress
As promised, the first article in the new series in which I will present the installation and configuration of a WordPress website.
First, we need a server or host device on which to install the website and database. There are two options: Online and Offline. Online takes place on a rented server and requires a domain name. It is much easier to install and configure a website and you have the advantage of being online. I can access and modify your website from anywhere. Offline involves installing a server on your device. You will only be able to edit your website through it and no one will be able to see it until you upload it to a server. The advantage is that you have no cost.
Online installation
As a hosting provider, I recommend Hostico. It is a Romanian company that I am quite satisfied with and in which I host all the websites in the SenDesign network and a large part of those of our clients. Of course, you can choose any other hosting provider. The instructions will be broadly the same. From the Web Hosting section you choose the basic package at 2 euro + VAT / month. It will be enough for a start. You will also need a domain name. If you don’t know what to choose, I’ve prepared a guide for you here. Opt for the annual payment and the domain will be free for the first year. Therefore, the initial investment should be around 28 euros. After placing your order, you will receive an email with passwords. We will use these to connect to the control panel.
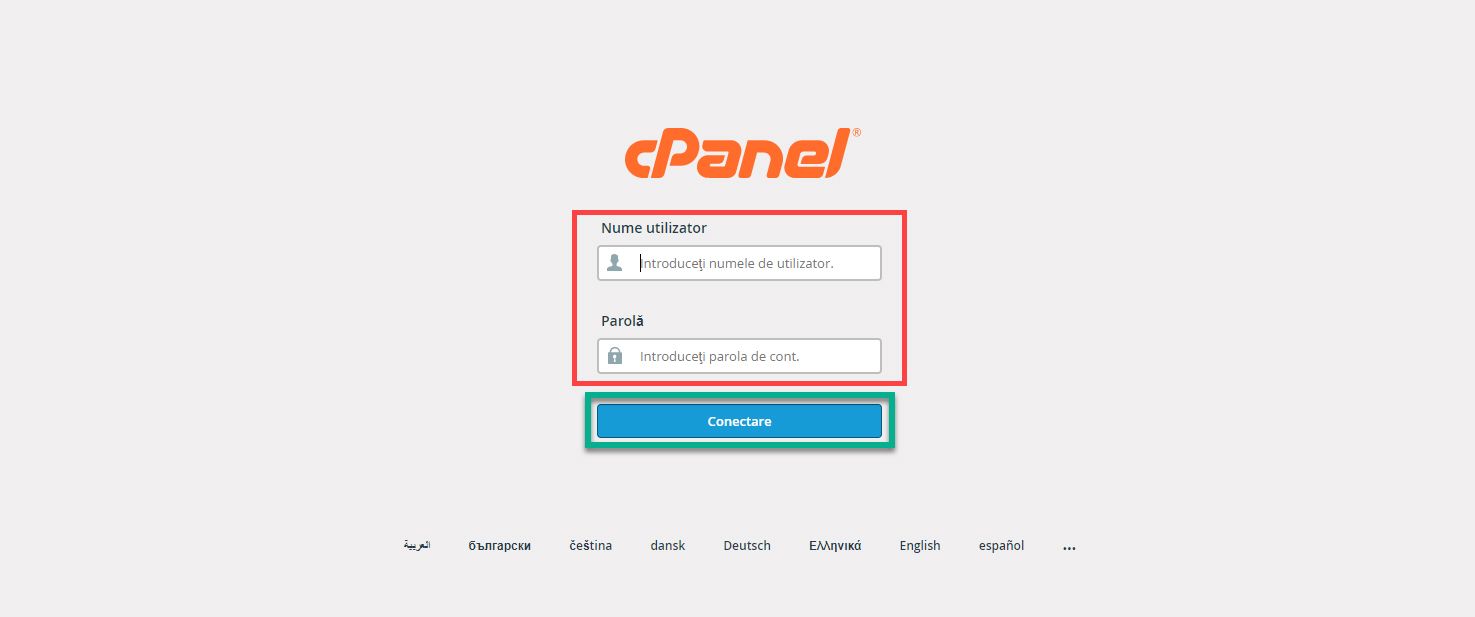
The control panel is called cPanel and can be accessed at domainname.com/cpanel where domainname is the web domain you purchased. You will also find the link in the email received from the hosting company. Enter the username and password you received and tap Sign in.
Here you will find many options and settings for your new website. But at the moment we are only interested in one. Scroll down to find the WordPress Manager by Hostico Installer or WordPress Manager button if you are using another hosting company.
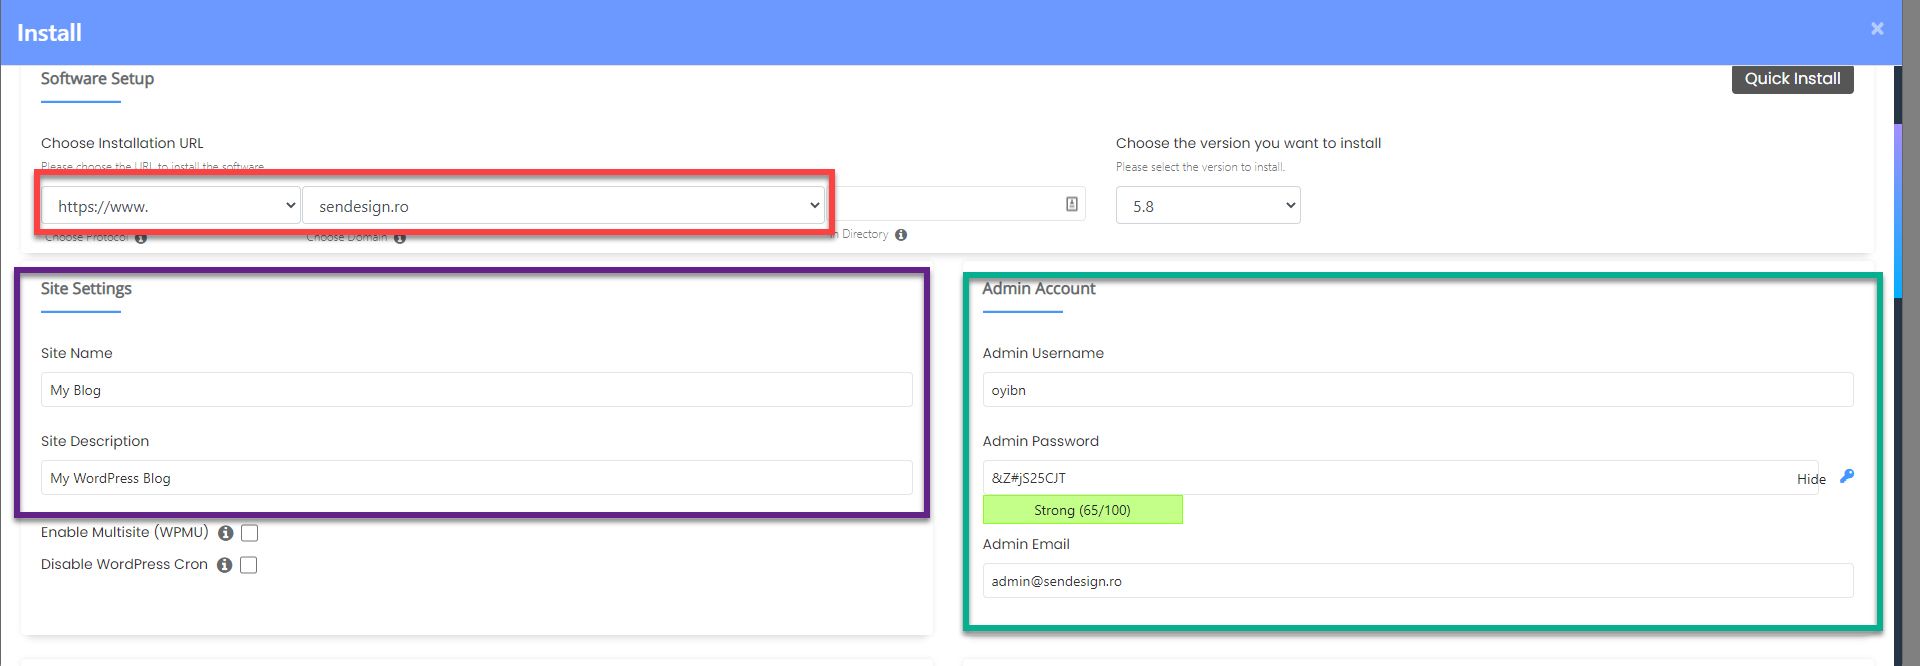
Click the Install button. An options window will open. Make sure the new domain is selected in the Installation URL section. Below, enter the name of your website, and a short description. In the Admin Account section, fill in the username, password and email that you will use to log in to the new WordPress installation. Finally, click the Install button at the bottom of the window.
Congratulations! Now you will be able to access your website at domainname.ro/wp-admin using the name and password created above.
Offline installation
For offline installation we need a utility called XAMPP that will allow us to host a server on the computer. It can be downloaded here. Choose PHP version 7.4.22. The installation process is quite simple. Start the downloaded executable and click next until the end. Now we need to download the WordPress files here by clicking the Download WordPress button.
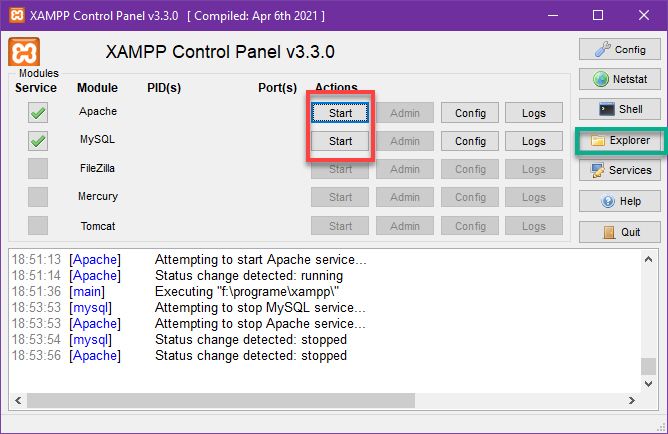
Open XAMPP. Here you have to start the Apache and MySQL services by pressing the start button next to them. To stop them, press the stop button. Each time the device is started, Apache and MySQL will need to be restarted for the server to work. Click the Explorer button to open the file window. Here is the XAMPP installation directory. Enter htdocs and unzip the contents of the previously downloaded WordPress archive here.
All local server addresses are of type http://localhost. The address of your new website will be http://localhost/wordpress. We need a database in which WordPress will store content and settings. Go to http://localhost/phpmyadmin/. Here you will find the phpMyAdmin utility we use for database management. This utility is also present in cPanel when installing online.
Click the New button in the upper left and then enter a name for the database. Click Create.
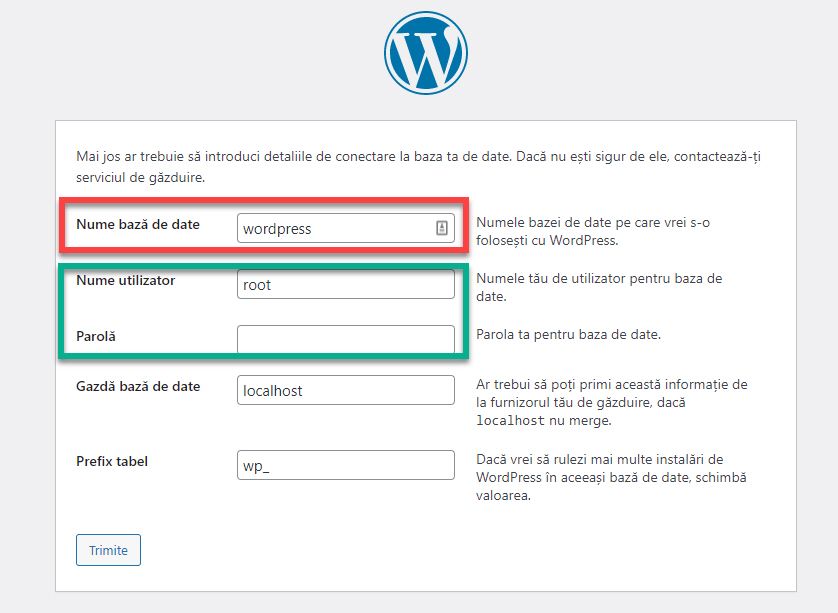
Now that we’ve created the database, it’s time to set up WordPress. Go to http:// localhost/wordpress and press the button Let’s get started!. In the new window, enter the name of the database you created earlier, the root username and leave the password field blank. Click Send again on the new page, click Run installation.
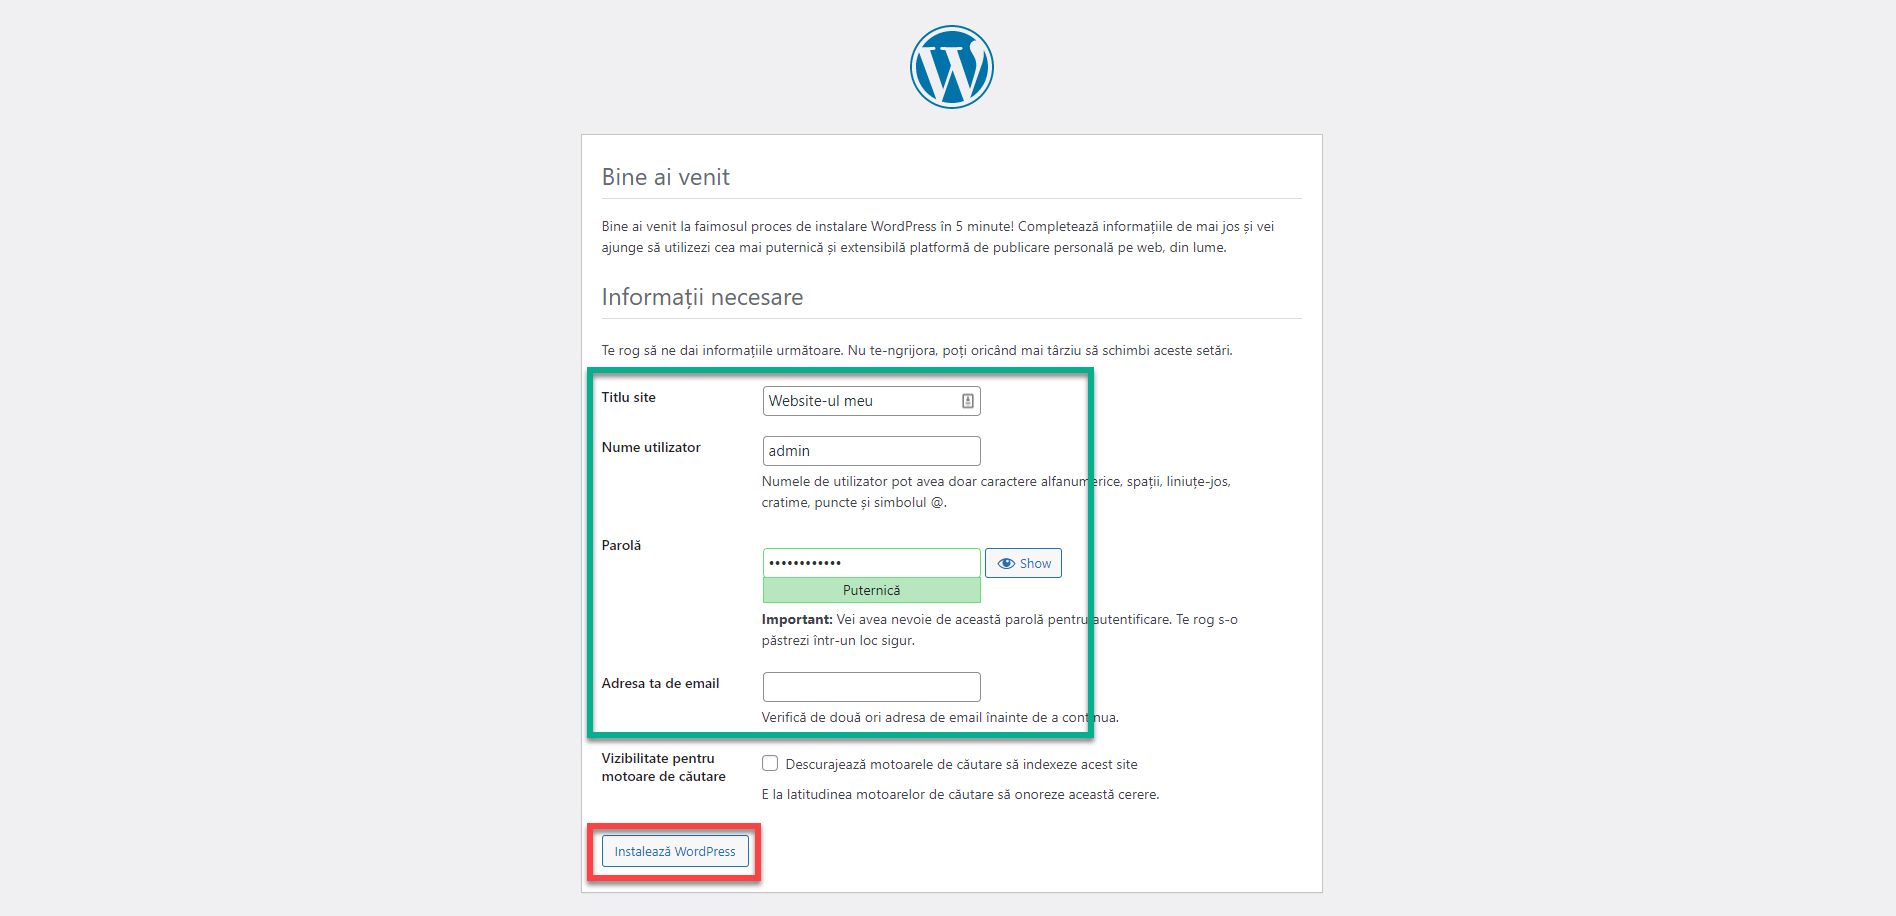
Fill in the website title, username, password and email address with which you will connect to the WordPress dashboard. Click Install WordPress.
If you entered the data correctly, you will be directed to a page titled Success! Thus, you have installed WordPress offline.
If you get confused or need help, I’m waiting for you on the SenDesign Community Facebook group!


